
sizzlingmario4
sizzlingmario4
About
- Username
- sizzlingmario4
- Joined
- Visits
- 18,774
- Last Active
Comments
-
I would just rework the cooldown addons and remove the cooldown recovery bonus from Overdrive. The base cooldown is fine now imo
-
It shouldn’t be nerfed, it should be reworked.
It’s not even a good perk for the average survivor, it’s only useful if you specifically try to use it in the most obnoxious way possible with certain other perks and/or on certain maps.
-
Solid perk.
-
I don’t mind how early they start appearing, but there should be a better way to differentiate between when it’s a warning and when the gen actually can’t be regressed anymore.
-
A lot of what I posted about Grim Pantry regarding edge-map totem spawns and generators, visual design, and elevation changes also applies to this map, so I'll keep this post a bit shorter.
Overall, I don't feel like Pale Rose favors either side, and this map is better than Grim Pantry overall. The big issue with this map is just how RNG-prone it is. The center area can have plenty of resources for survivors, or have very little to work with. The jungle gym in the corner can be really strong, or it can be one of the weakest kinds and it's the only one on the map so there aren't other jungle gyms elsewhere that make up for that area being strong or weak.
This map could also use a few more lockers in the areas that don't have them.
Additionally (and this applies to Grim Pantry too, I forgot to mention it for that map) having killer objects like Plague fountains in the corners/edges of the map is just awful.
-
Overall survivor sided because of the main building being pretty strong, but susceptible to RNG and more than anything else this map just feels very outdated. You can tell this is one of the older maps just due to its visual design and loop design as a whole, as well as the placement of certain objects.
The main building as a whole is a bit too strong for survivor and it's often best for the killer to just defend generators elsewhere and avoid the main building. I will say, I actually really like the part of the building upstairs where there are 2 windows right next to each other - this part of the building is fine and it gives this map something unique that no other map has. But chaining those windows into the other upstairs window on the other side can be very powerful and easily waste a lot of the killer's time without much effort.
For the lower part of the main building it can also be difficult to tell at first sometimes which entrances/exits are open and which ones are closed.
On the other hand, this map is also very susceptible to spawning really strong 3-gens for killers, such as the one circled here (I got a super-rare spawn here where there was no gen in the main building at all, but 3-gens like this often appear even when there is a main building gen):
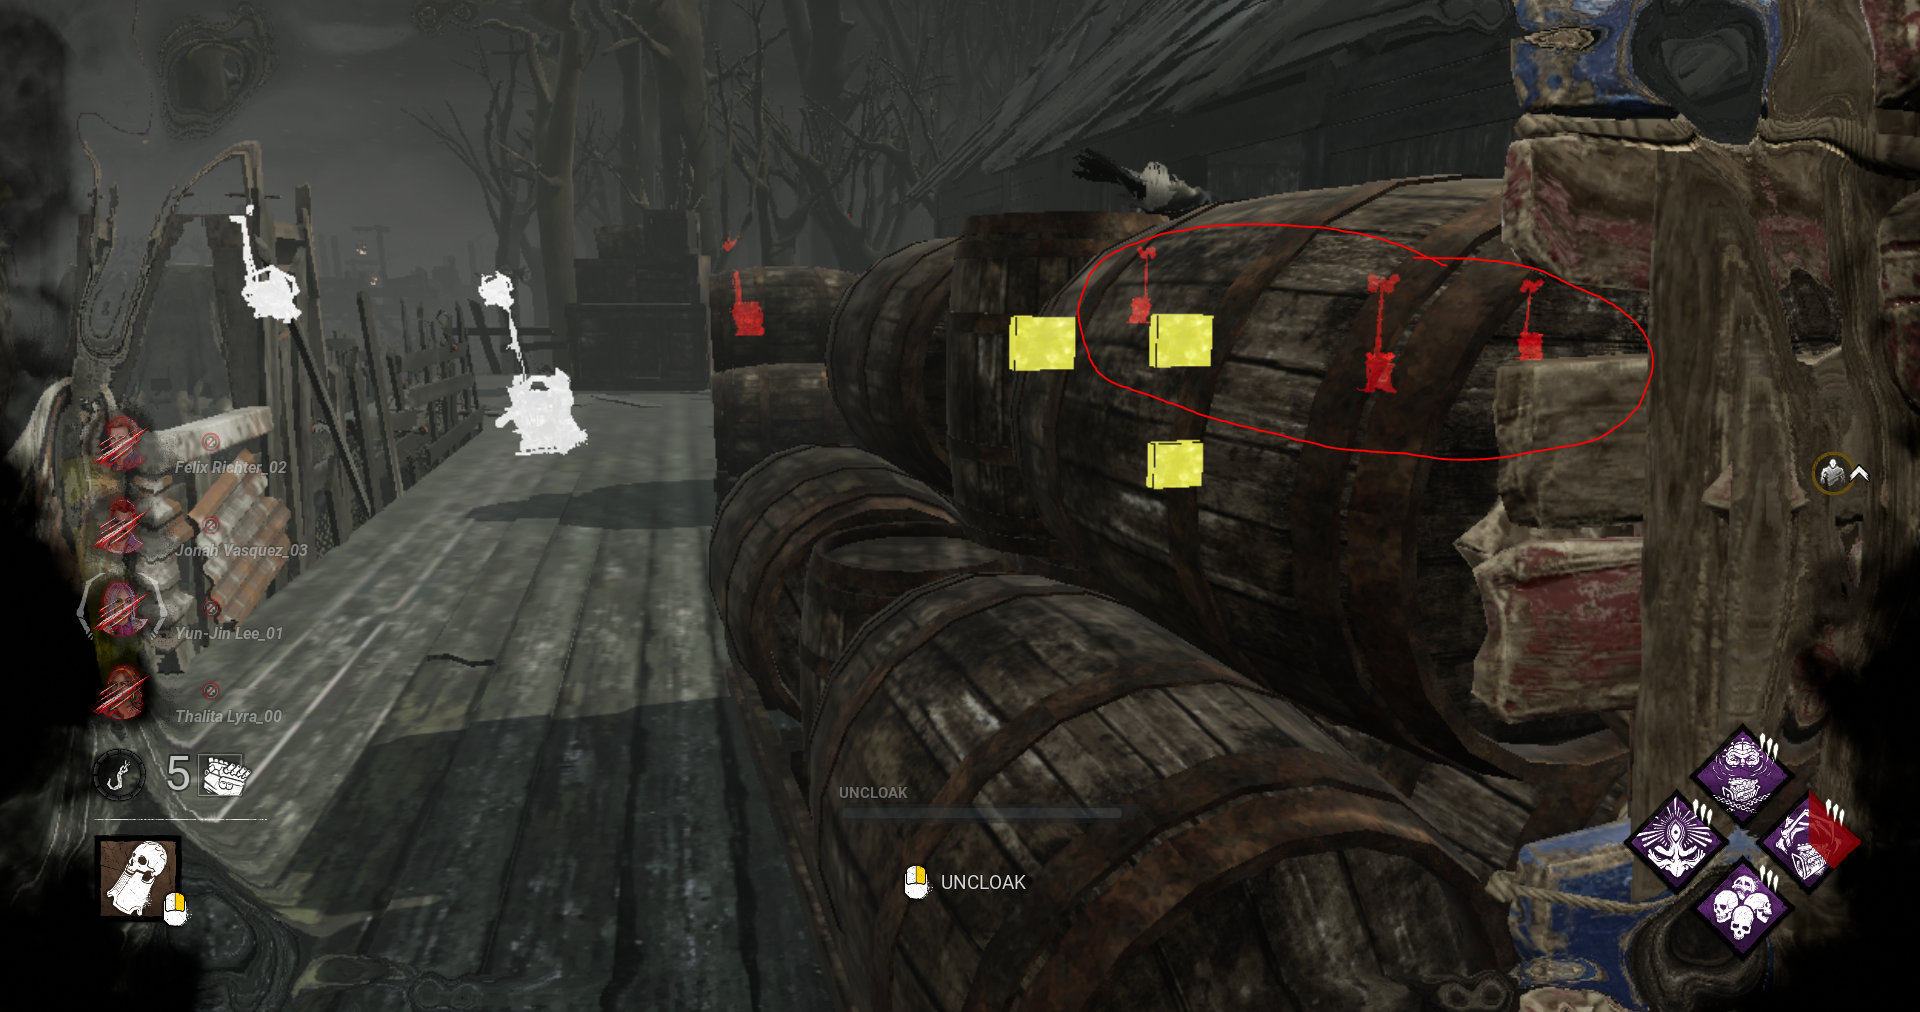
And this is often the most desirable way for killers to play on this map (just staying on that side of the map where most of the generators are and/or defending a cluster of gens), since chasing survivors at the main building is often a really bad idea and too much of a waste of time for the killer.
This smaller building is also kinda inconsistent in strength when it comes to the downstairs doors being open or closed. For example, you can get a variation like this where there's a door open downstairs which makes the downstairs pallet more accessible:
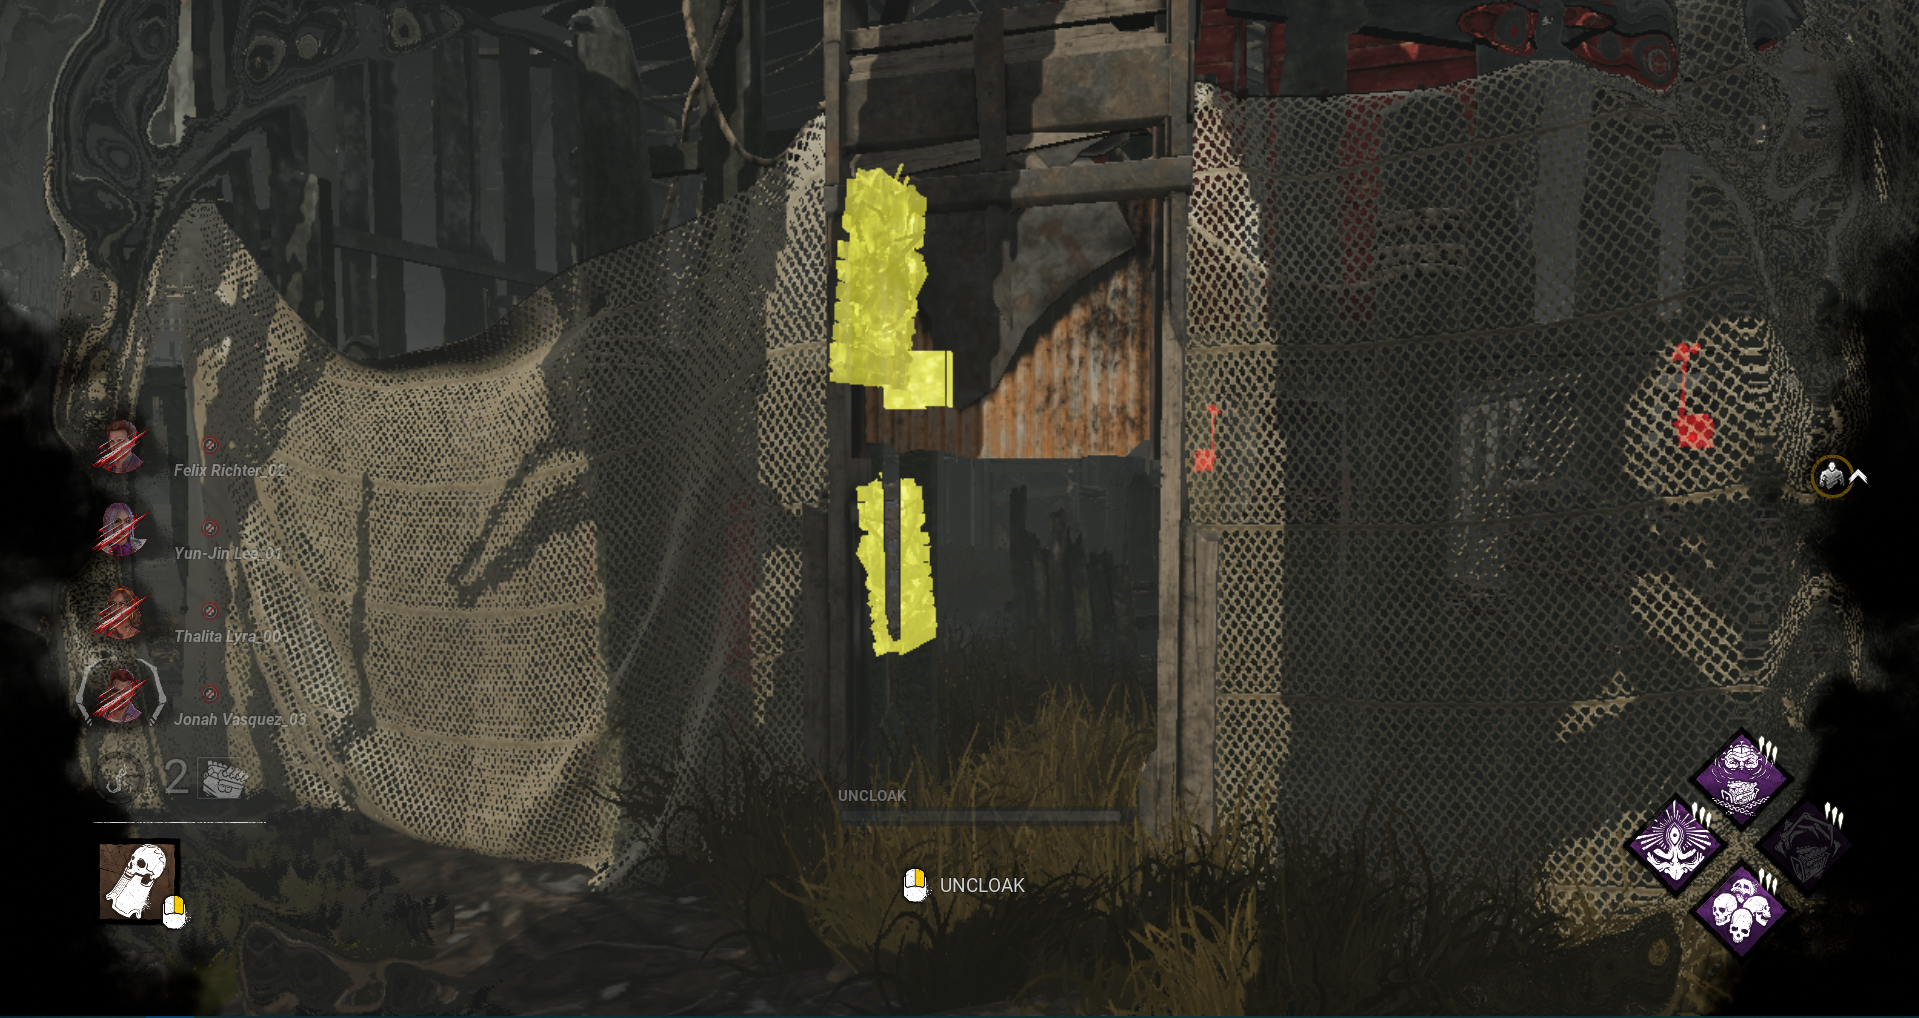
It's also possible for both downstairs doors to be open.
But you can also get a variation like this, where both the downstairs doors are closed which makes the downstairs pallet much harder to get to and less appealing for survivors since they only have 1 way in and out of that area (the staircase inside the building). This just makes it a bad idea for survivors to go downstairs in here, since the killer can just corner the survivor away from the staircase and break the pallet, then they get a free hit since the survivor has nowhere to go:
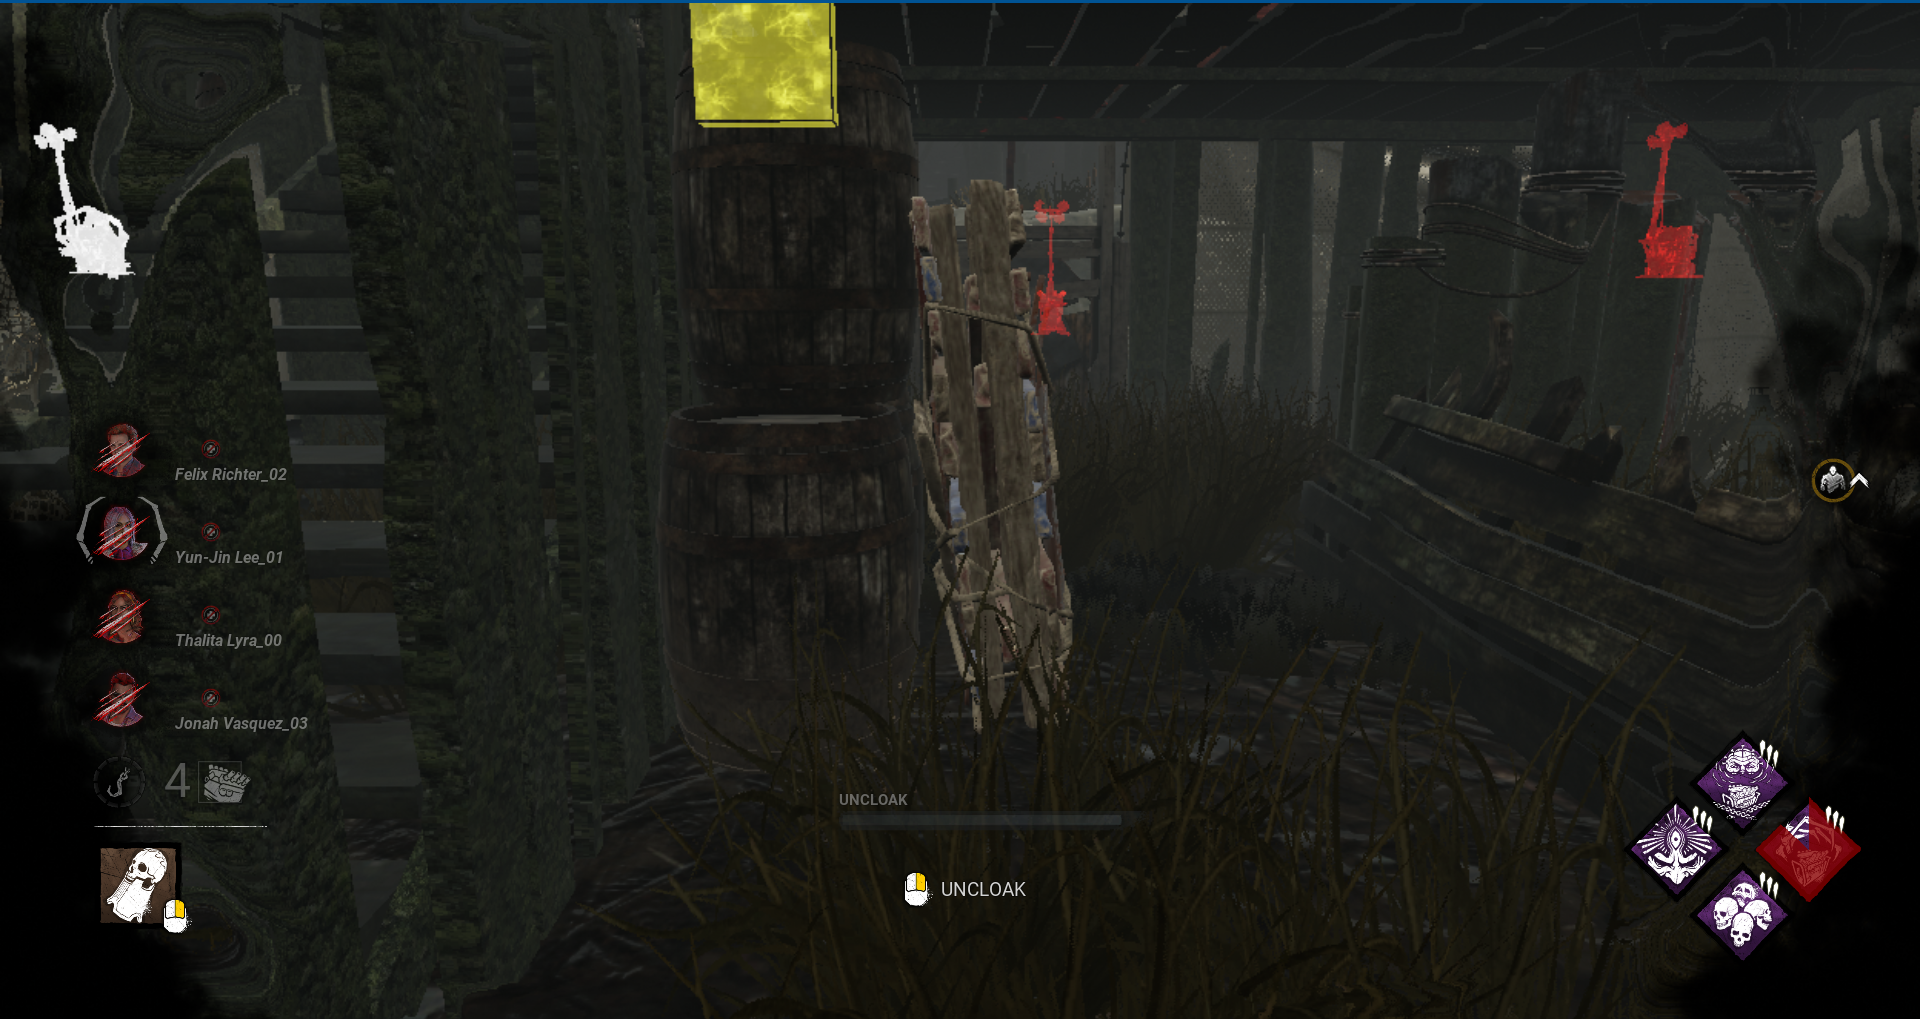
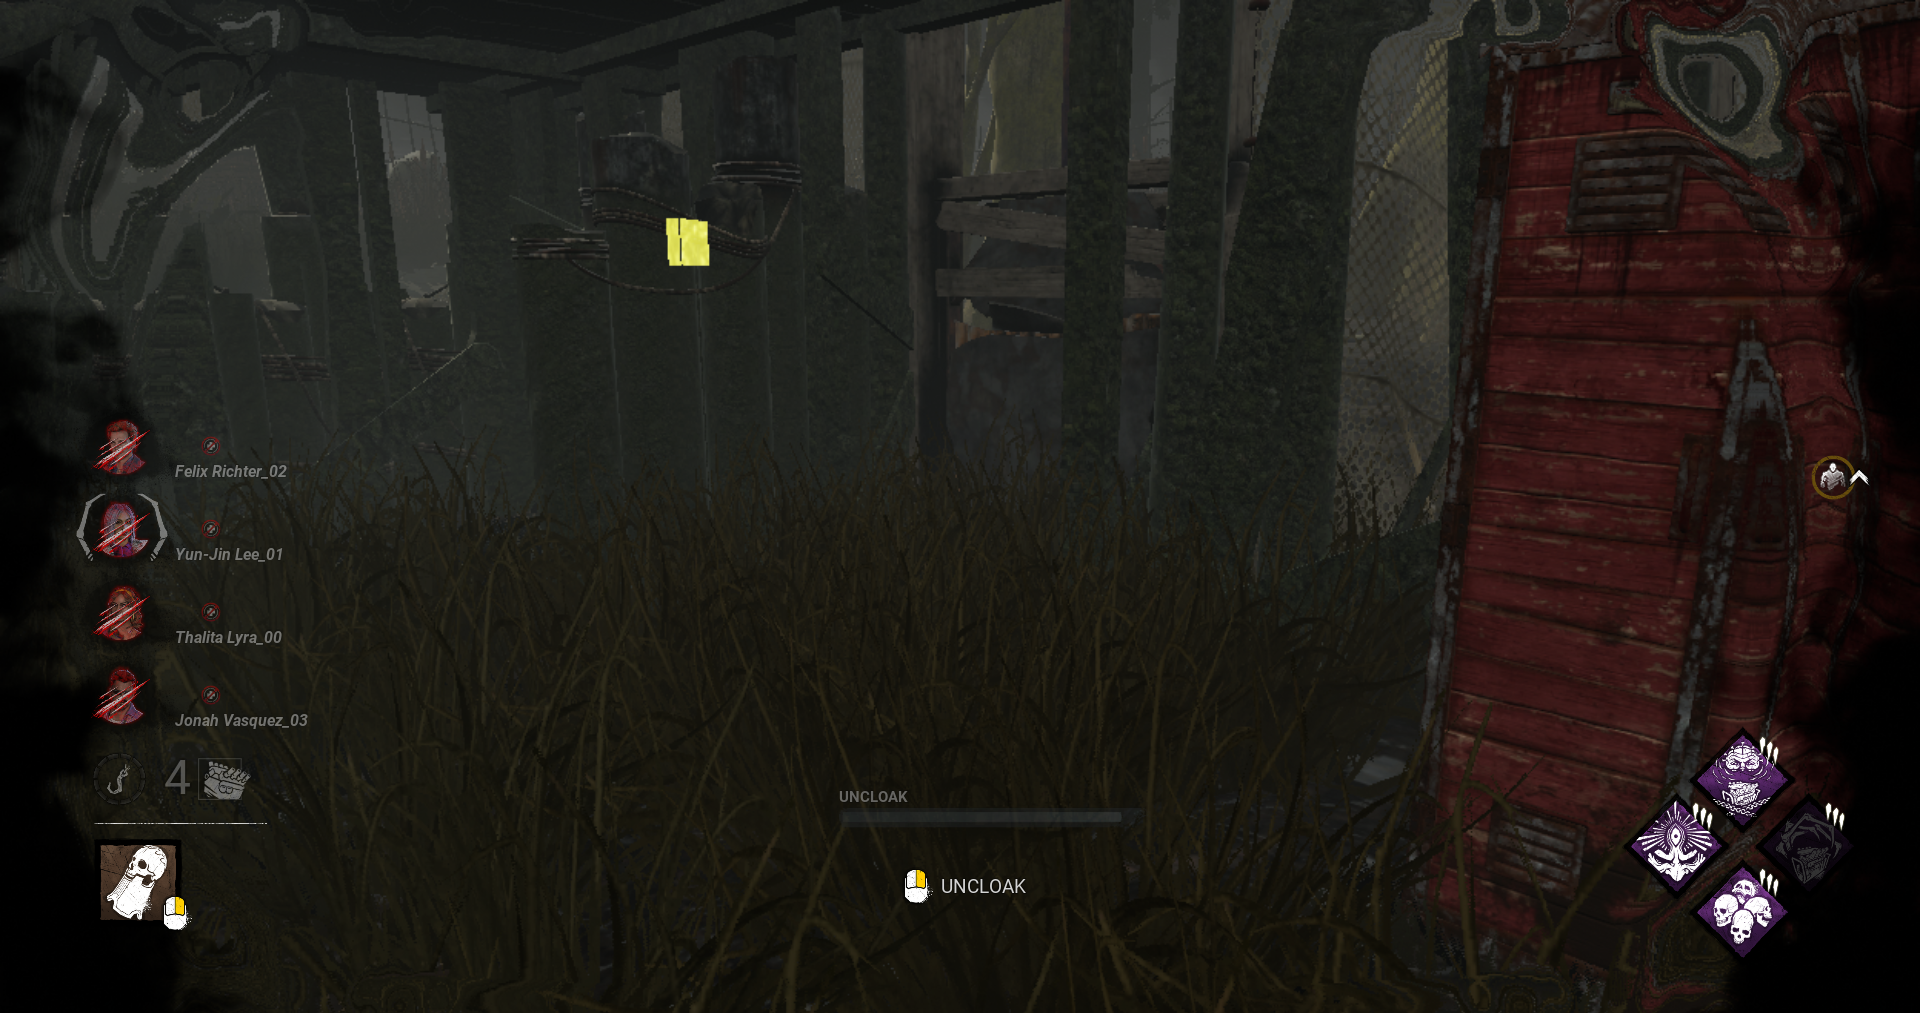
The upstairs part of this smaller building is perfectly fine though, I would just suggest making these door openings more consistent overall (ie. there shouldn't be both doors closed).
Totem spawns on this map could benefit from being reworked. They can often be predictable as there are always totems that appear by these specific rock-formations here (there are always 2 of these both somewhat near the killer shack):
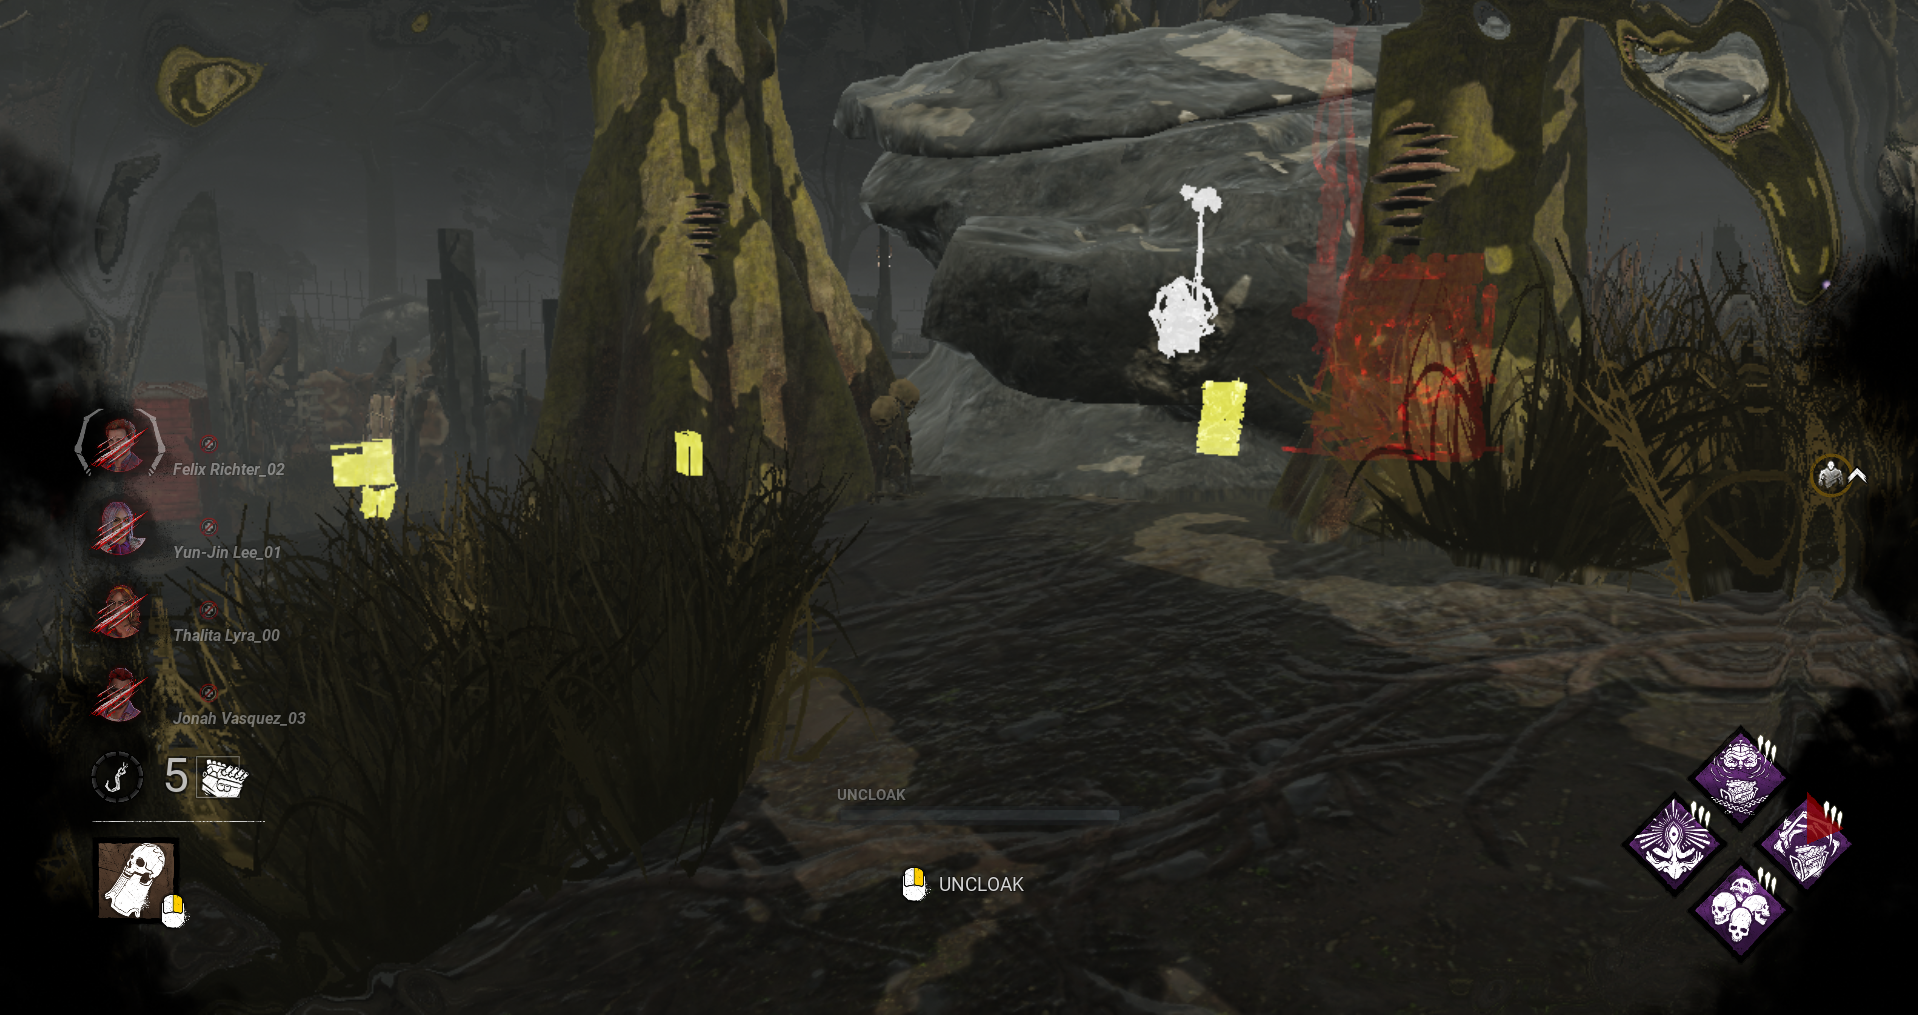
Then the other totems often appear on the very edges of the map, which is unintuitive as no other map in the game does that. But for experienced players who know this, it can make them rather easy to find if you know where to check, though they are still undesirable locations for boon totems (since they're often in a corner so you're wasting a lot of their range) and predictable places to find and destroy hexes.
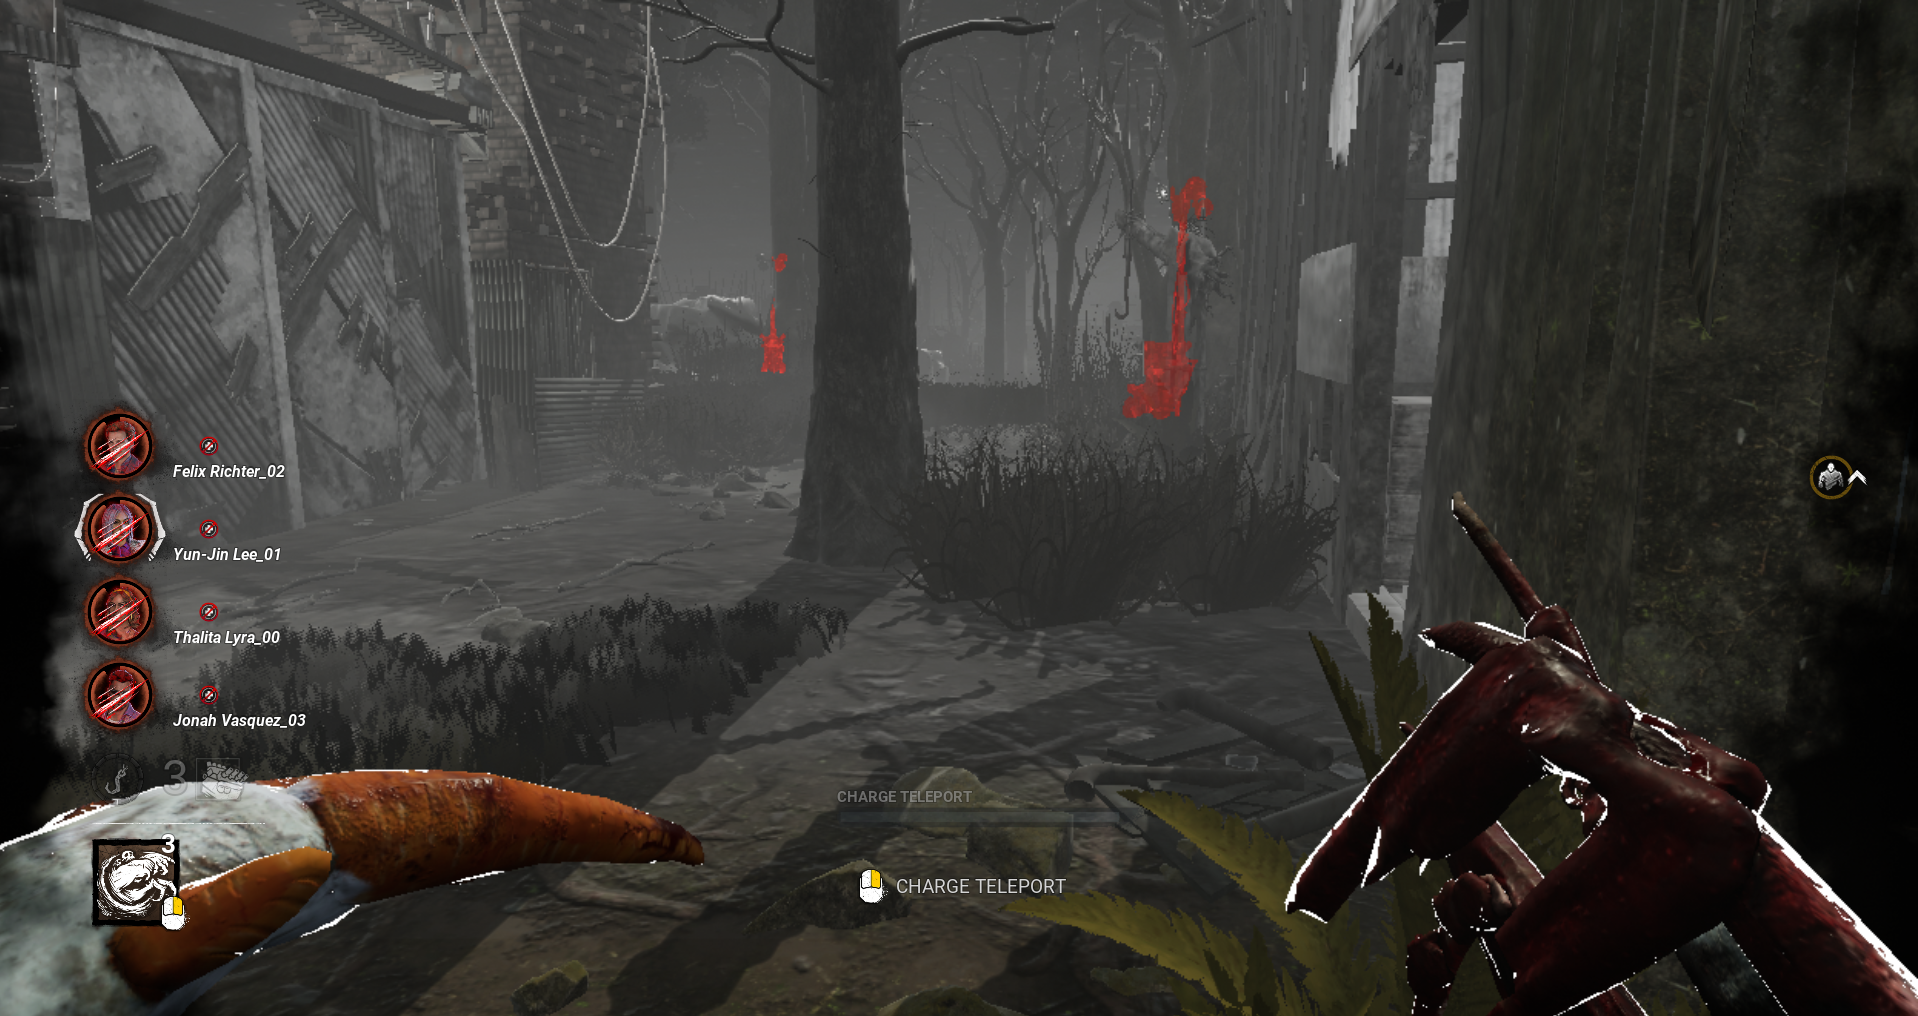
There can also be generators occasionally appearing on the very edges (or even in the corner) of this map which is just unfun for both sides, because the killer suddenly has a wider area to patrol and has to go farther away from everything else to patrol it, but survivors who get found there can often be easily caught out of position if there isn't a log loop or filler pallet nearby, making the generator very unsafe to work on. This gen, for example (I'm standing on top of the pier structure here, this is far away from the main building):
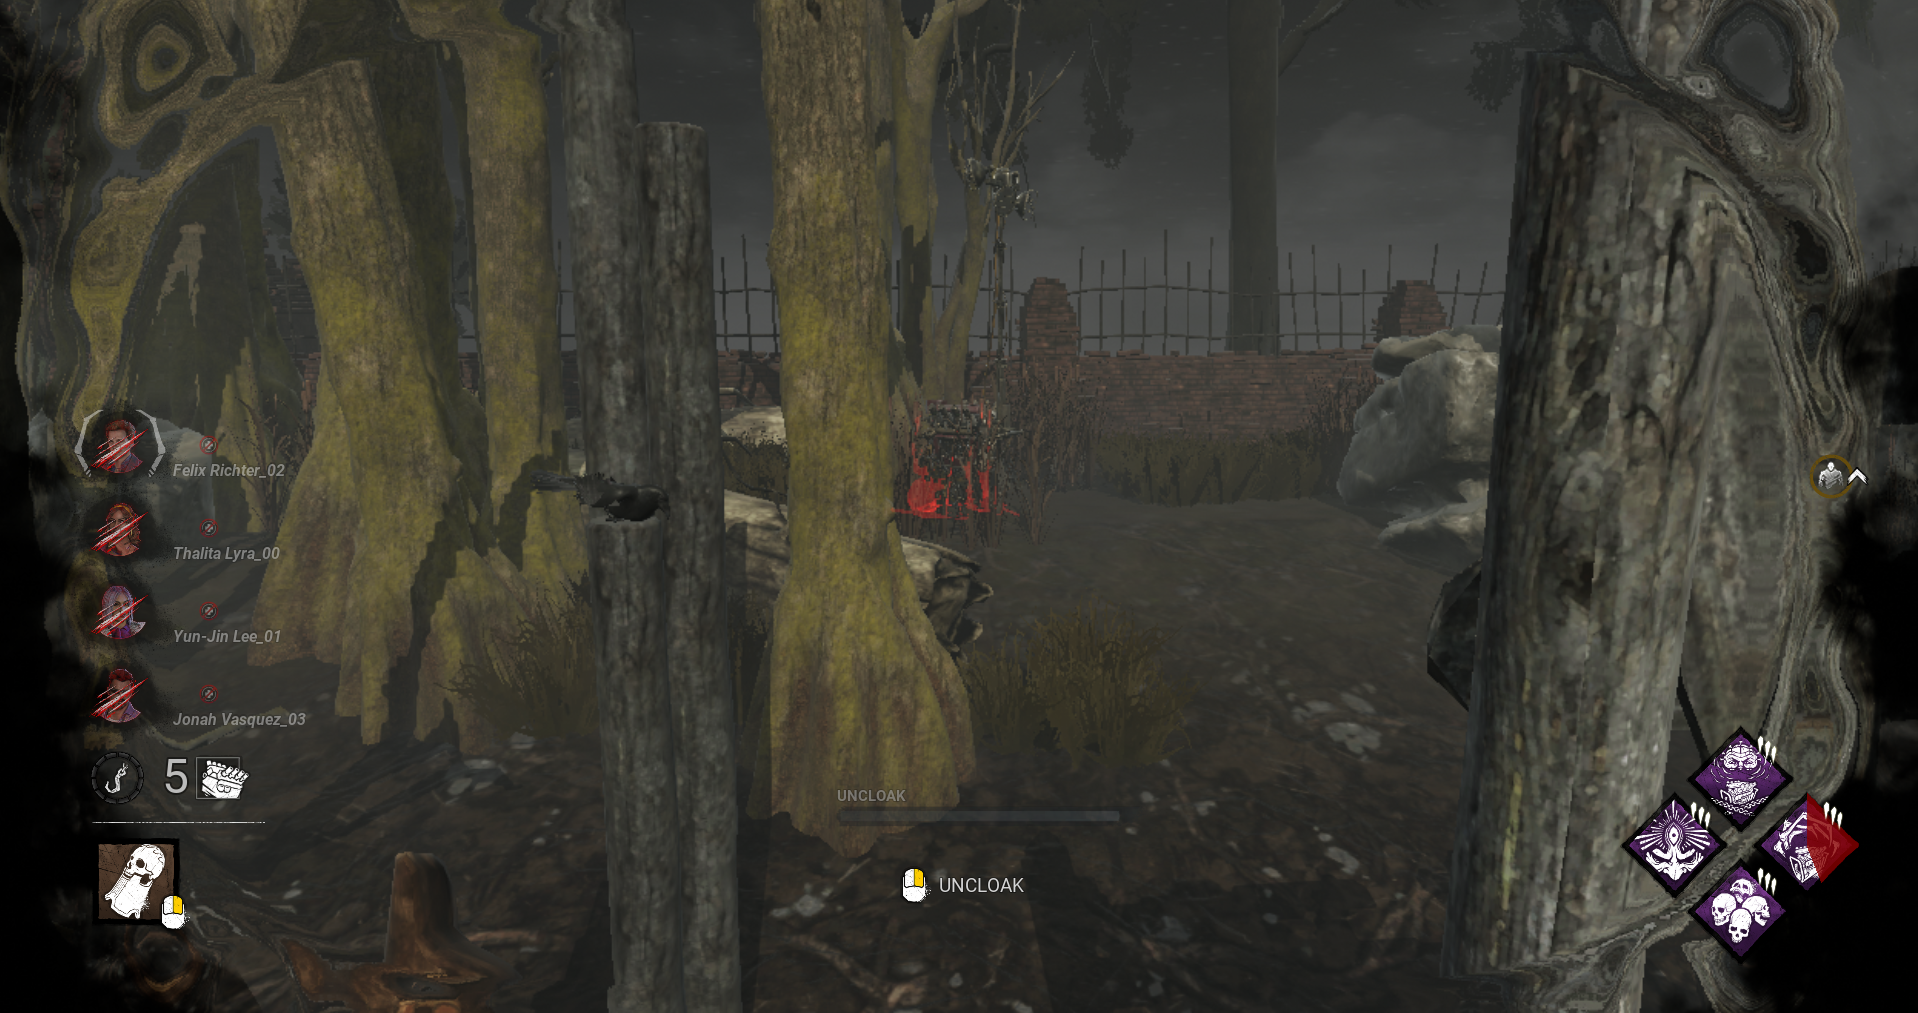
And that one way off towards a corner of the map, too:
There can also be one behind the main building too against the very edge of the map.
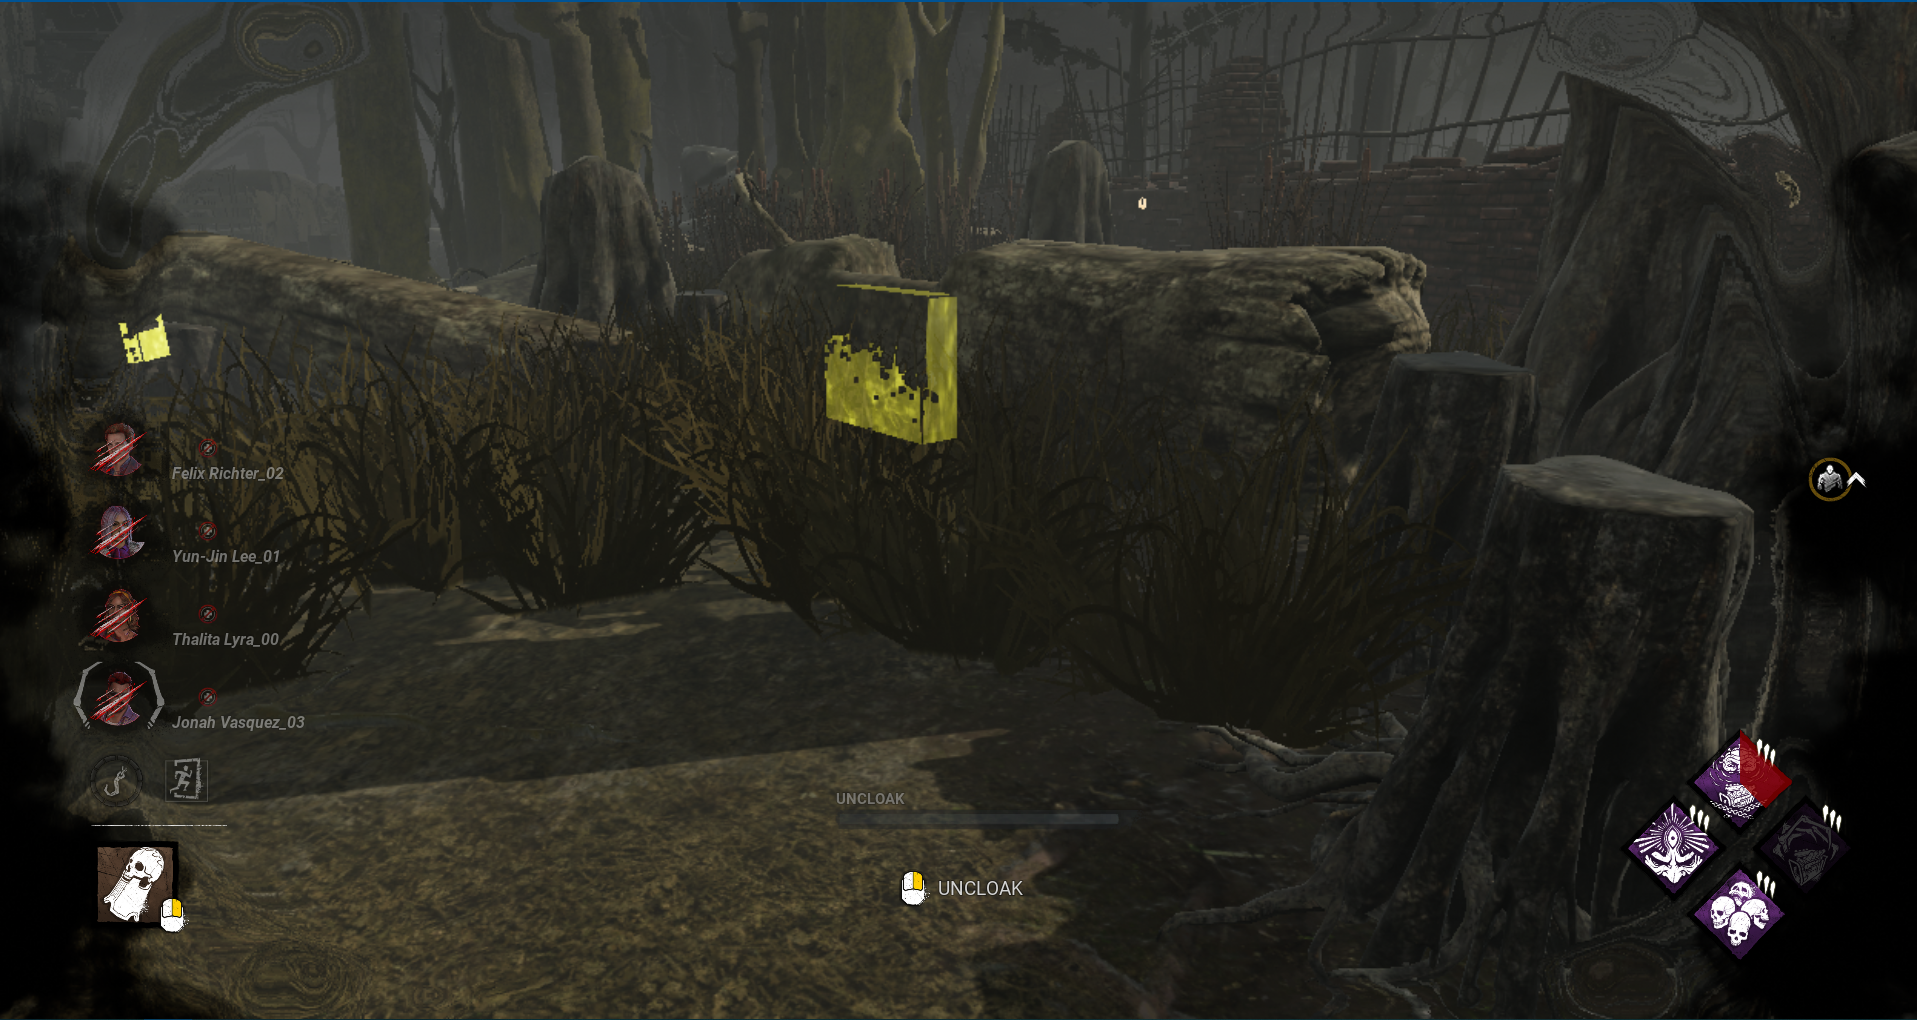
This particular log loop which usually spawns in corners of the map (often referred to as the "pog log") is also a bit strong vs. m1 killers in particular:
This map also has a lot of hills and changes in elevation as you traverse the map which are kinda awkward and don't add much to gameplay, but it's especially bad for killers like Artist in particular since changes in elevation like that mess up her crows (since they don't change elevation once they travel a certain distance).
-
This is the most survivor-sided set of maps in the game imo.
There are multiple strong buildings for survivors which don't encourage much skill expression for either side and it's often quite easy to chain a filler pallet into a strong building, or vice versa to save a stronger building pallet for later. (There's an example of this below.) The presence of several buildings as well as plenty of filler objects/bushes/etc. throughout the map also makes it very easy for survivors to hide on these maps (easier than most maps). Generators can be difficult for the killer to patrol since 3 of them are on different elevation from the ground (either above or below). This map can also be difficult for killers who use lockers as part of their power, since lockers only appear in buildings (and in the small hut near one of the buildings).
The main building is an absolute nightmare when dealing with Boil Over and/or sabotage, especially if the basement appears in the shack. It can be very easy to make the killer unable to hook anyone who runs down to the lower floor. On the other hand, a survivor getting hooked in the basement in main building can put survivors in a very difficult position since it's basically a double-basement in a way.
There are also sometimes pallet spawns very close together, such as this example from Badham II where there are 4 filler pallets all surrounding and in close proximity to the killer shack, not including the actual shack pallet (the 4th one is on the opposite side of the shack just outside of Zanshin range):
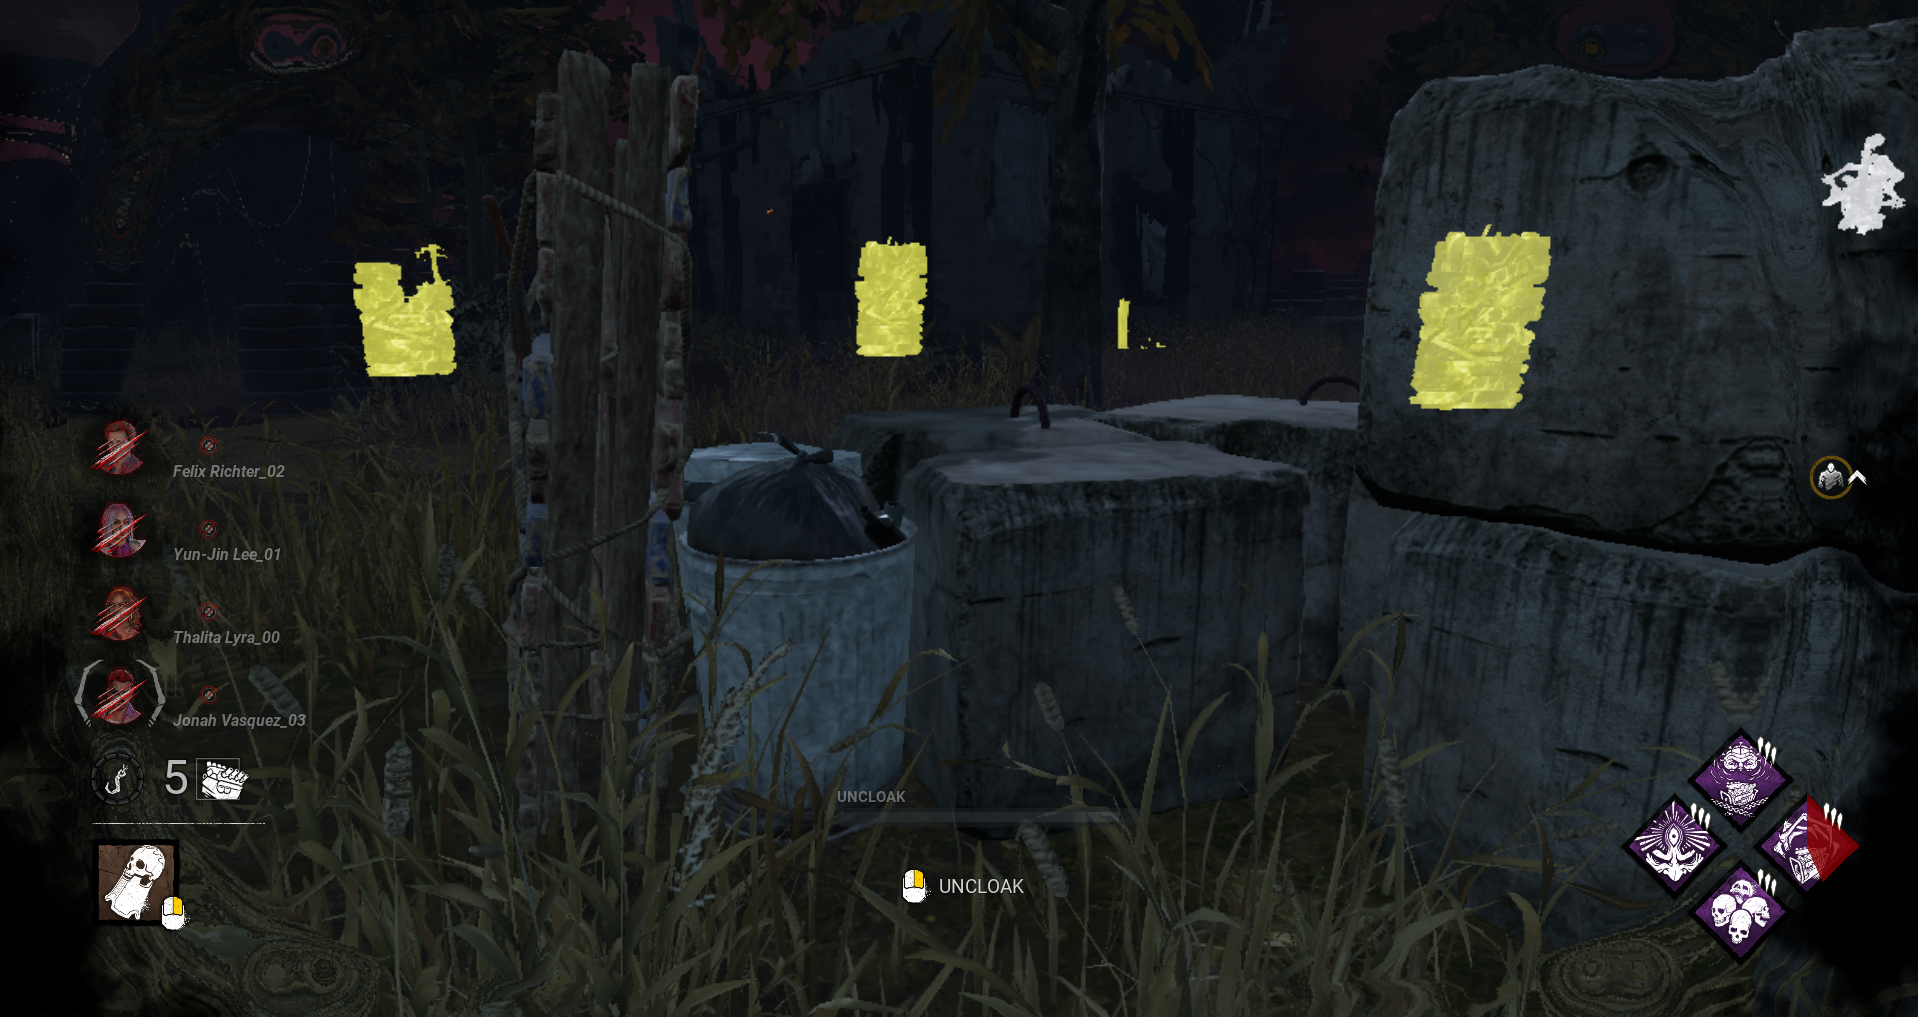
I also feel that having 5 different versions of this map when the changes mostly amount to just slightly changing the map's shape and moving the same buildings and pallets around is just unnecessary and makes it very difficult for new players (both survivor and killer) to learn the map.
-
Thwack does need a buff, but making it on every pallet with no other requirement would be too strong.
-
Unnerving Presence - In addition to current effects it now also eliminates great skill checks entirely while in the killer's terror radius (ie. there will only be a good skill check zone).
Friendly Competition - When completing a generator with at least one other survivor, you and other survivors you completed the generator with gain the following:
- 5% repair speed bonus (unchanged)
- 10% bonus to healing, sabotaging, cleansing, blessing, unlocking, unhooking, and exit gate opening (new effect)
- This lasts 70/80/90 seconds (was 45/60/75).
Spine Chill - Action speed bonus is increased to 6/8/10% (was 2/4/6%) and now lingers for 5 seconds (was 0.5 seconds).
-
@sinkra said:
https://forums.bhvr.com/dead-by-daylight/discussion/comment/3663782#Comment_3663782
Was it different before? Because I read comments from when Xeno came out and people were saying they didn't drop turret because it made them easier to spot.
No it was never like that.
The only thing they have changed about turrets after Xeno's release is that they made them slightly easier to place in tighter areas.
-
No, the blue beam and ring showing the turret radius is only visible to survivors.
-
Nurse got nerfed about a year ago, her blink attacks are special attacks now so you can’t use exposed perks with her power anymore.
-
Depending on gen spawns, it’s either balanced or slightly killer sided. There can sometimes be a lot of generators on one side of the map and almost none on the other side. It’s not as big of a deal as it used to be before the anti-3-gen mechanic, but it’s still something that could be improved on this map.
Other than that this map is fine imo.
-
Ormond is okay overall but it’s a little too big which makes it lean towards survivor a bit.
I don’t really have any problems with it other than that.
-
Distortion doesn’t activate in that scenario because FTTE does not reveal your aura when it changes the obsession - it only causes you to scream, which is different from an aura reveal.
The only time FTTE reveals your aura is when you are already the obsession and another survivor gets hooked; that is the only time Distortion will trigger.
-
Iridescent Tag was changed in patch 7.5.2 and doesn’t allow infinite rushes anymore, it now caps rushes at 3 which is part of its new effect.
Compound 33 is still capped at 2 rushes for the time being so it is working as intended. It will be increased to 3 rushes when the 7.6.0 update releases in a couple of weeks.
-
I think they can remove the extra movement speed penalty, but the slower lock on rate should stay the way it is.
-
Was also planning to try the Dark Devotion + Unforeseen combo, lol.
On survivor I want to try Wicked (the reworked version with basement self-unhook) with Second Wind, to potentially trick the killer into thinking it's Deliverance until they see I'm healed suddenly. Though I might wait a bit to try that since I think killers might try to avoid basement for the first few days in anticipation of that perk.
@tjt85 said:
I want to use Unbound in a vault build with Legion at some point (with Fire Up + Superior Anatomy). Sure I won't win a single game with it but it might be fun to try anyway.
And I'm looking forward to getting myself killed in the basement so many times with Sable's basement Self-Care perk (I want to try it with Botany and Self-Care to do a turbo heal).
Strength in Shadows and Self-Care don't stack together, that will just let you heal yourself at 60% speed if you're in the basement and 35% if you're not (Self-Care won't give any benefit in the basement if you have both perks). Pairing either with Botany will work though.
-
That tome 1 challenge with needing to pop 4 of the gens yourself with Dark Sense is awful. There's not really any trick to it unless you're playing with a SWF that can help you get it. If you're a solo survivor you pretty much have to get lucky with getting a match where that just happens to work out for you, your teammates aren't going to know that's what you're doing.
I just very recently completed all the tome challenges I was missing (literally all of them in every tome except for the "That's Rude" challenge in tome 6 which doesn't work) and I forgot how awkward and difficult some of the ones are that I was missing until I did them. The one in tome 3 to grab 2 survivors off generators with Discordance in the same game is really bad too especially since that one entirely relies on survivors making a mistake by letting you grab them; you can sneak up on someone doing a gen as perfectly as possible and they still might notice you at the last moment. The ones to be within 10 meters of the killer without being caught for 60 seconds in 1 game are also really awkward, I ended up resorting to using Bond and bringing Midwich offerings and following the killer on the opposite floor while they were chasing someone else to get those challenges. And in order to do that basically meant me being a completely useless survivor for an extended period of time.
In general any challenges which encourage (or sometimes require) you to be extremely inefficient (sometimes to the point of throwing a game) in order to do, or ones that rely on other players doing certain things (ie. like the Discordance-grab one, or the tome 1 challenge for 6 survivors to step in bear traps in 1 game) are frustrating to complete. Having to go a little out of your way to do a challenge is fine (it is a challenge after all), but a lot of (mostly older) challenges do this a bit more than is really necessary.
-
@Akumakaji said:
https://forums.bhvr.com/dead-by-daylight/discussion/comment/3661034#Comment_3661034
You are sure about this? I was under the impression that Hex: Two can play and Face the Darkness get disabled for the rest of the match, when the totem gets cleansed once it spawns into the map. Face the Darkness has the added twist that once its condition is no longer met, ie the survivor that spawned it gets healed, then the perk gets deactivated for the time being and the hex totem becomes dull again. But if the survivor cleanse it once during its uptime, its gone for good.
But Two can play has no deactivation condition, so once its gone its gone for good.
Two Can Play and FTD don’t work the same way. While FTD has that temporary deactivation condition, it’s gone forever if it gets cleansed. If Two Can Play is cleansed, it will deactivate, but can be reactivated again on another dull totem if you get stunned/blinded 2 more times. The only time it will be gone forever is if there are no more totems for it to occupy. So it is not as risky as traditional hex perks. It’s still not a very good perk though since the blind duration is too short.
-
This is how it was on the PTB with being tied to health states instead but the problem was that it allowed survivors to take STBFL tokens away with perks like FTP and Plot Twist.
What they could do instead is have it lose tokens on any basic attack or special attack which causes damage. So for example the first 7 Trickster knives don’t cost any tokens, but the 8th knife will.
-
Not a chance.
Sable will be at least semi-popular I think, but nobody's coming close to Feng and no one ever will.
-
I think it could be improved. Right now it has a lot of weak pallets which is bad for survivor, but it's also a huge map which is bad for killer.
-
He can be really scary in the right hands and is one of the best killers at quickly shredding through pallets, but he's too addon-reliant to rank him any higher than B tier.
-
Very good changes. The 2-second yellow cloud activation and having 6 bottles basekit are both a big deal. He’s going to feel a lot nicer to play now.
-
I don't really blame BHVR for being cautious with wiggle-related perks especially after the Boil Over fiasco a couple of years ago. They probably didn't want to buff Breakout to 25% without any drawback.
But I agree the changes were a nerf overall and the old version with the lower bonus was slightly better. Even though it has a higher bonus now, it's harder to stay in range and constantly be giving the carried survivor the wiggle bonus without being hit by the killer on accident. And 5% extra wiggle speed doesn't really make up for that imo. I would rather have the old version back as well.
-
It depends on how many hooks I got and if I feel I played well that match or not. If I get a 2k with 6 or 7 hooks, I'll usually consider the match a loss and be unsatisfied with the result. If I get a 2k with 8-10 hooks then I might consider it a draw or a loss depending on how the match went as a whole (most likely a draw).
-
It’s alright and can be useful sometimes.
However, it can actually be bad in certain situations where vaulting would’ve allowed you to follow up with a hit. Since the break animation for the addon slows you down for a couple seconds.
I think making it work more like Iridescent Button would make it too strong though and lead to too many free hits without much counterplay, so I wouldn’t change it.
-
If anything it’s BL2 and 3 that should be nerfed, not BL1.
-
It's alright on its own, though the Hindered is definitely the main draw of the perk if you're using it by itself.
But the 50% Haste REALLY shines if you use Fixated with it since that gives you a combined 70% extra walking speed while shining a flashlight which is almost as fast as running (only about 4% slower than survivor running speed). Run flashlight addons that increase the length of the flashlight beam and you can flashlight killers without losing much distance at all, on top of slowing them down for a few seconds.
The other thing you can do with this combo, is gimmick builds like this one: Champion of Light + Fixated + Sprint Burst + Built to Last. With this, I would use the flashlight to cover distance at almost running speed while recovering exhaustion at the same time AND leaving no scratchmarks. And you can either do this in chase to get SB back mid-chase, outside of chase to cover large distances without wasting your SB, or to quickly cover a distance to hide from the killer without leaving scratchmarks (since technically you are walking and not running) while again preserving your SB. Since this uses up a lot of flashlight battery I threw on BTL as my last perk so I could refill the flashlight when needed and have it last for the entire match. The first match I tried this build, I finished the last generator with the killer on their way (who, unbeknownst to me at the time, had NOED and would've instadowned me) but I was able to slip away without being found since I could go at almost running speed without scratchmarks AND even if he had actually found me I then still would've had SB ready despite quickly getting far away from the generator. It was fun.
-
@OneAutumnLeaf said:
https://forums.bhvr.com/dead-by-daylight/discussion/comment/3659564#Comment_3659564
I still dont see a problem with that your taking up 1-2 perk slots for a set effect, and again its not like the gen is regressing you can literally go hide in a locker till its up and bam your still at like the same amount of progress, and gen blocks dont really help killer much either since you cant kick/regress a gen, the amount of times Ive seen a gen at 99 blocked is insane.
Grim Embrace and DMS dont stack, its still just 30 second block.
Gen blocking = gen progress that's not being made. That's still slowdown.
yeah having to wait a extra 30 seconds to pop a gen really dosent impact much dude, you can go hide in a locker and wait it out and bam, perk did literally nothing useful but waste some time.
There is value in wasting survivors' time, that is the whole point of it. If there wasn't, these perks wouldn't be meta.
-
It's good on stealth killers or with perks that make you stealthy. On other killers it's okay but I think there are better options.
-
@OneAutumnLeaf said:
https://forums.bhvr.com/dead-by-daylight/discussion/comment/3639192#Comment_3639192
Its not a problem at all..... its not like it regresses the gen dude. its not diffrent then deadlock. simple fix, dont get off gens if you know that have DMS?
I never said it was a problem if the survivor lets go of the gen themselves. If they do that, that's on them. What is a problem is when it is combined with other perks that force survivors to let go of a generator against their will. It's not as big of a deal with Pain Res + DMS since you can react to the survivor's aura going on the hook/let go right before, but in other cases like with Grim Embrace or Ultimate Weapon it's not really realistic to try to let go and wait for those perks to trigger before getting back on the gen, you don't know when they're going to trigger and you sometimes can end up wasting more time trying to counter it than you would've if you just worked on the gen as long as possible until it gets blocked.
It's very different than Deadlock, Deadlock activates 4 times per match and only blocks 1 gen each time (there's also no guarantee anyone is even doing that gen, you might get no value), whereas the Grim Embrace + DMS combo can block multiple gens at a time that were being worked on.
And it doesn't matter if it doesn't regress the gen. Gen blocking = gen progress that's not being made. That's still slowdown.
-
If it worked more like a BNP it might be worth it sometimes. In its current state it's not really useful at all.
-
@D0NN1ED4RK0 said:
https://forums.bhvr.com/dead-by-daylight/discussion/comment/3657950#Comment_3657950
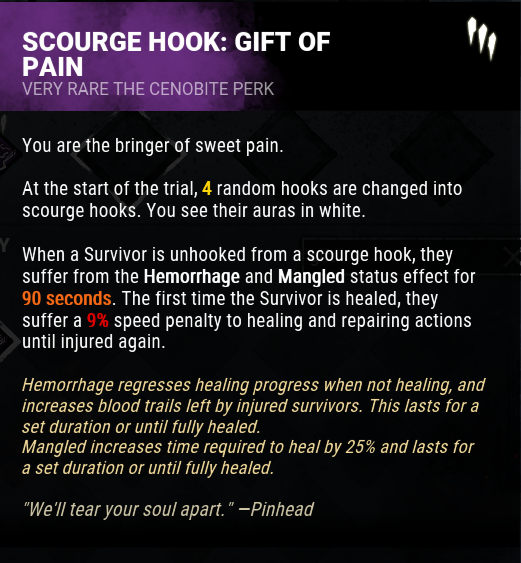
Wait gift of pain nerfed?
Yeah, this is the PTB description for it:
-
@BlightedDolphin said:
https://forums.bhvr.com/dead-by-daylight/discussion/comment/3657511#Comment_3657511
Does anyone know what the other changes are?
Blood Echo is also listed but it was already on a timer so how did they change that?
Blood Echo wasn't changed at all, the patch notes said it was changed but it's not.
Pyramid Head's purple addon that gave hemorrhage when stepping on a trail got reworked; now it's like a sloppy butcher but for Punishment hits, both status effects last 80 seconds.
All other Mangled addons have timers depending on addon rarity, yellow addons are 60 seconds, greens are 70, purples are 80. Perks with Mangled now last 90 seconds at tier 3 (Gift of Pain + Sloppy). Dredge's Tilling Blade addon which already had timed Mangled got buffed to 80 seconds (instead of 60).
Gift of Pain got nerfed back to 9% instead of 16% (I have no idea why they did this).
-
I really wish the pod placement was a bit smoother. A lot of the time when you try to shoot biopods onto something they just won't work, often because they're too close to some corner or something, even though realistically there is still enough space to fit one there.
For example, I can put a pod here:
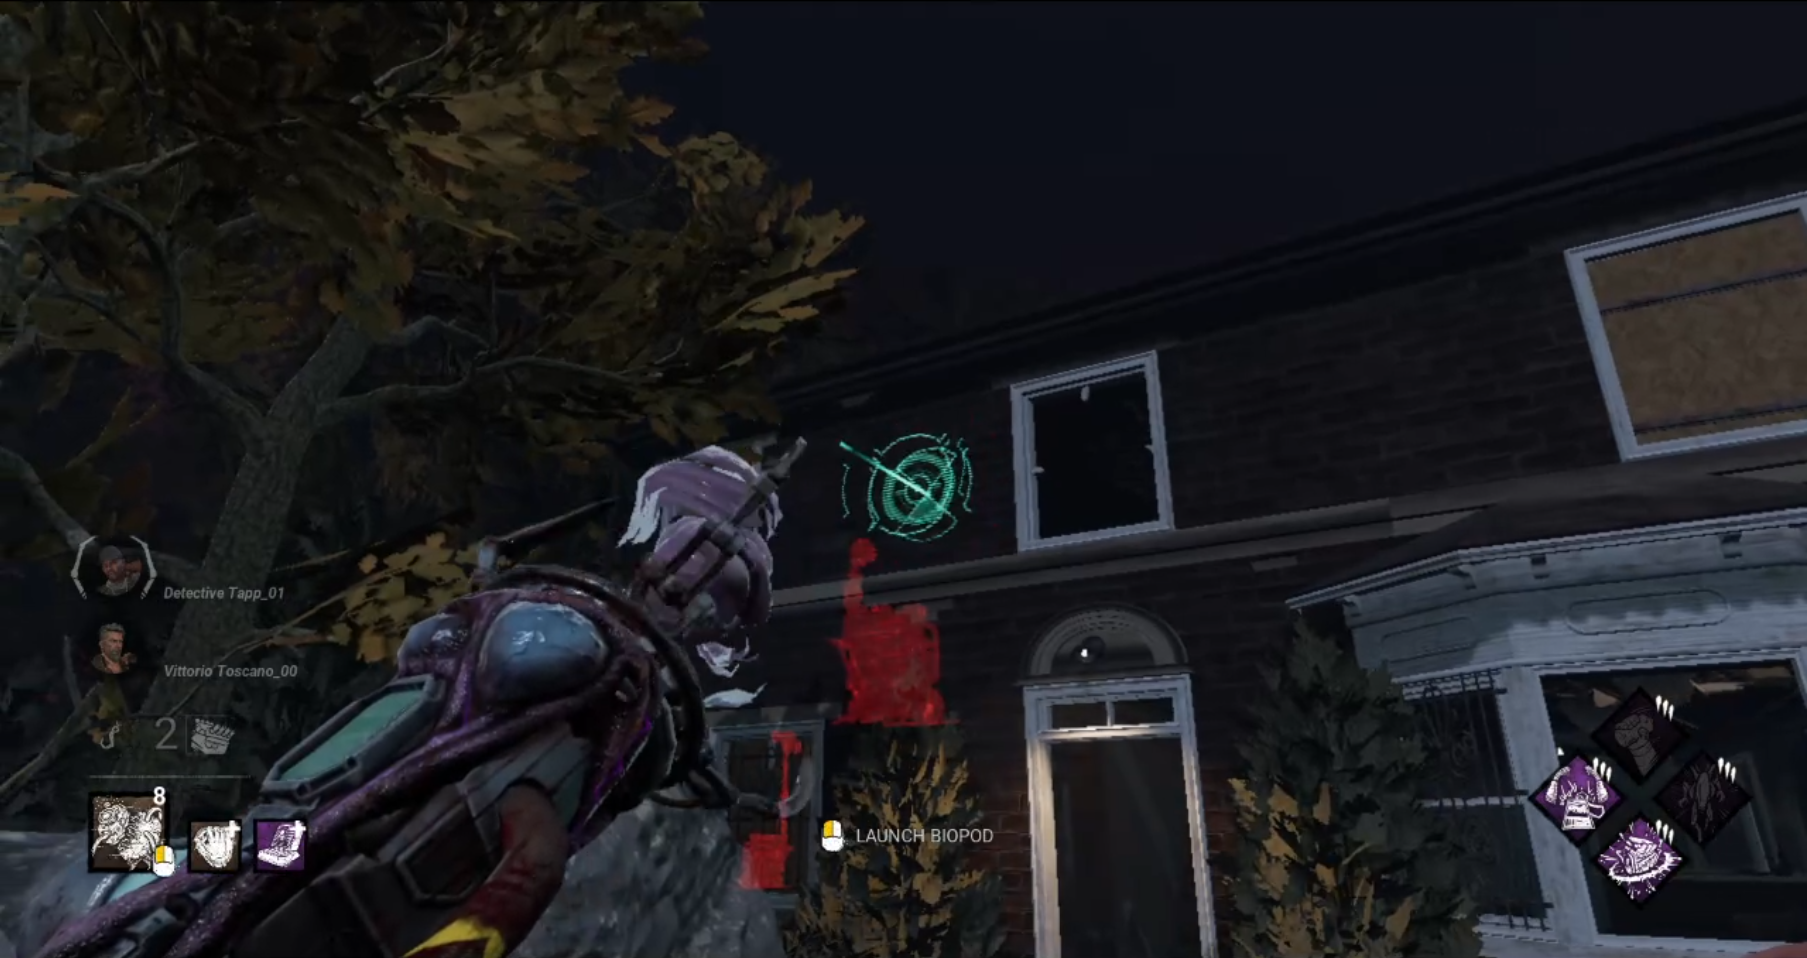
But if I move just a tiny bit away from that spot, now suddenly I can't, even though there is still space between where I'm aiming and where the window is:
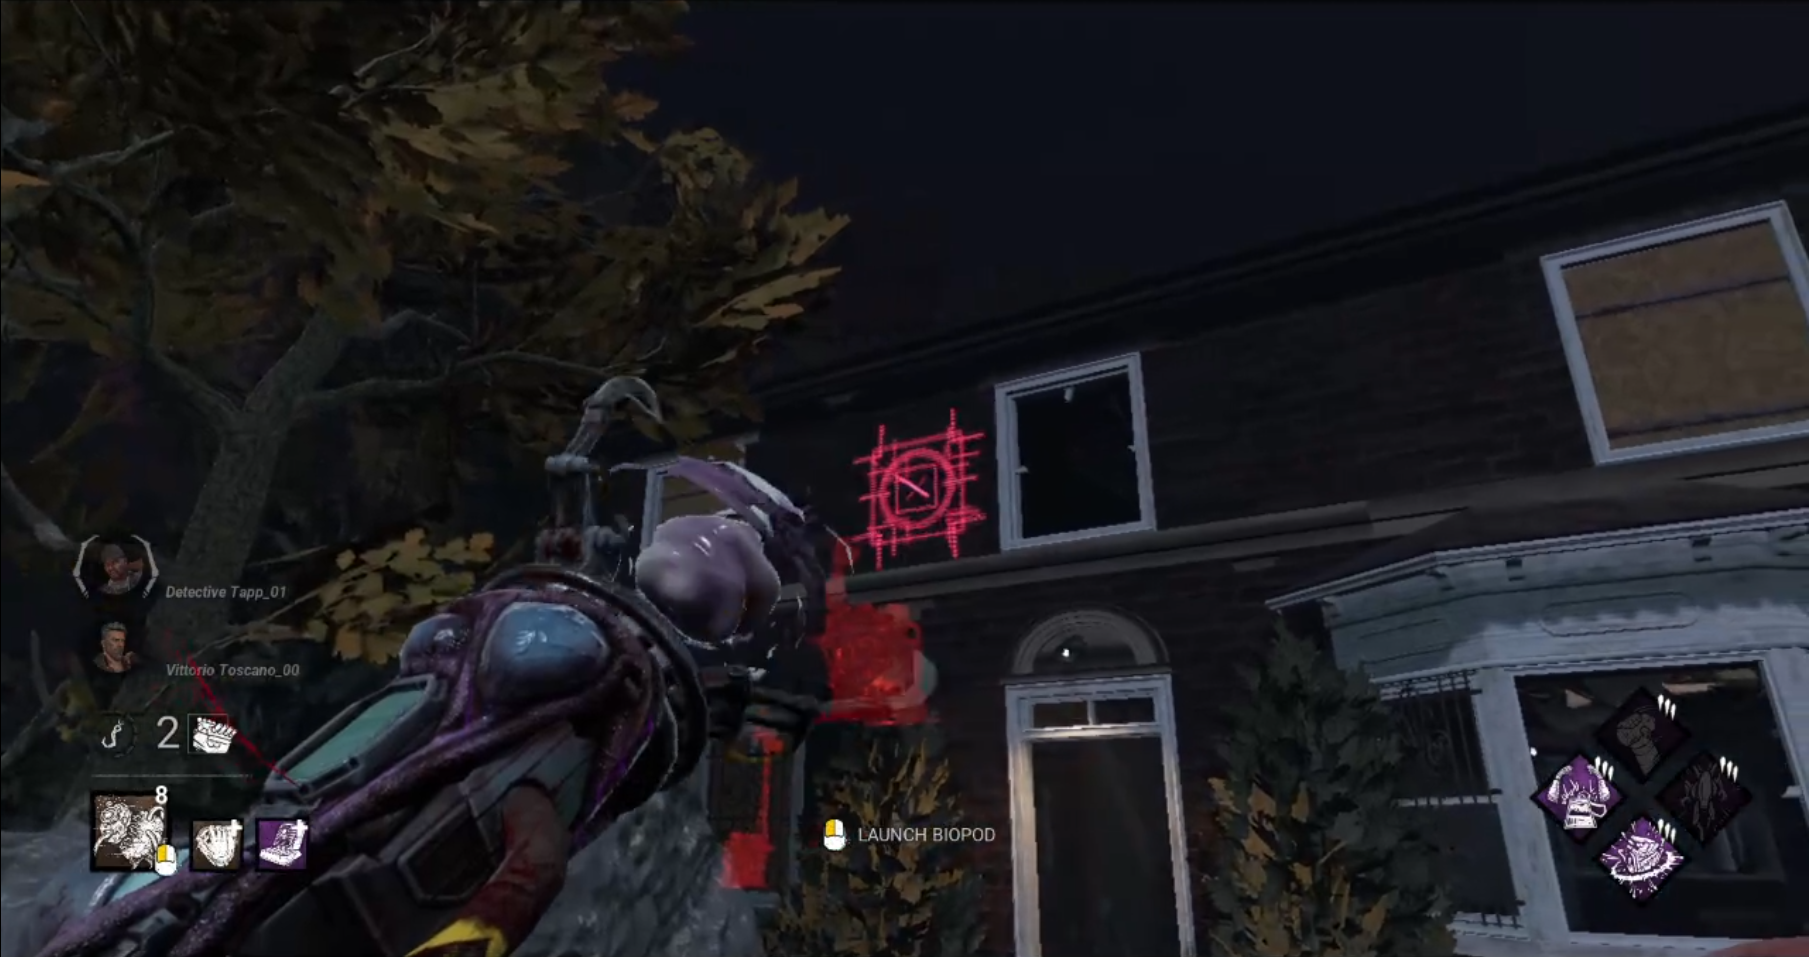
I also can't, for example, put one in this rounded part of the pillar here (you either have to move to the left or the right):
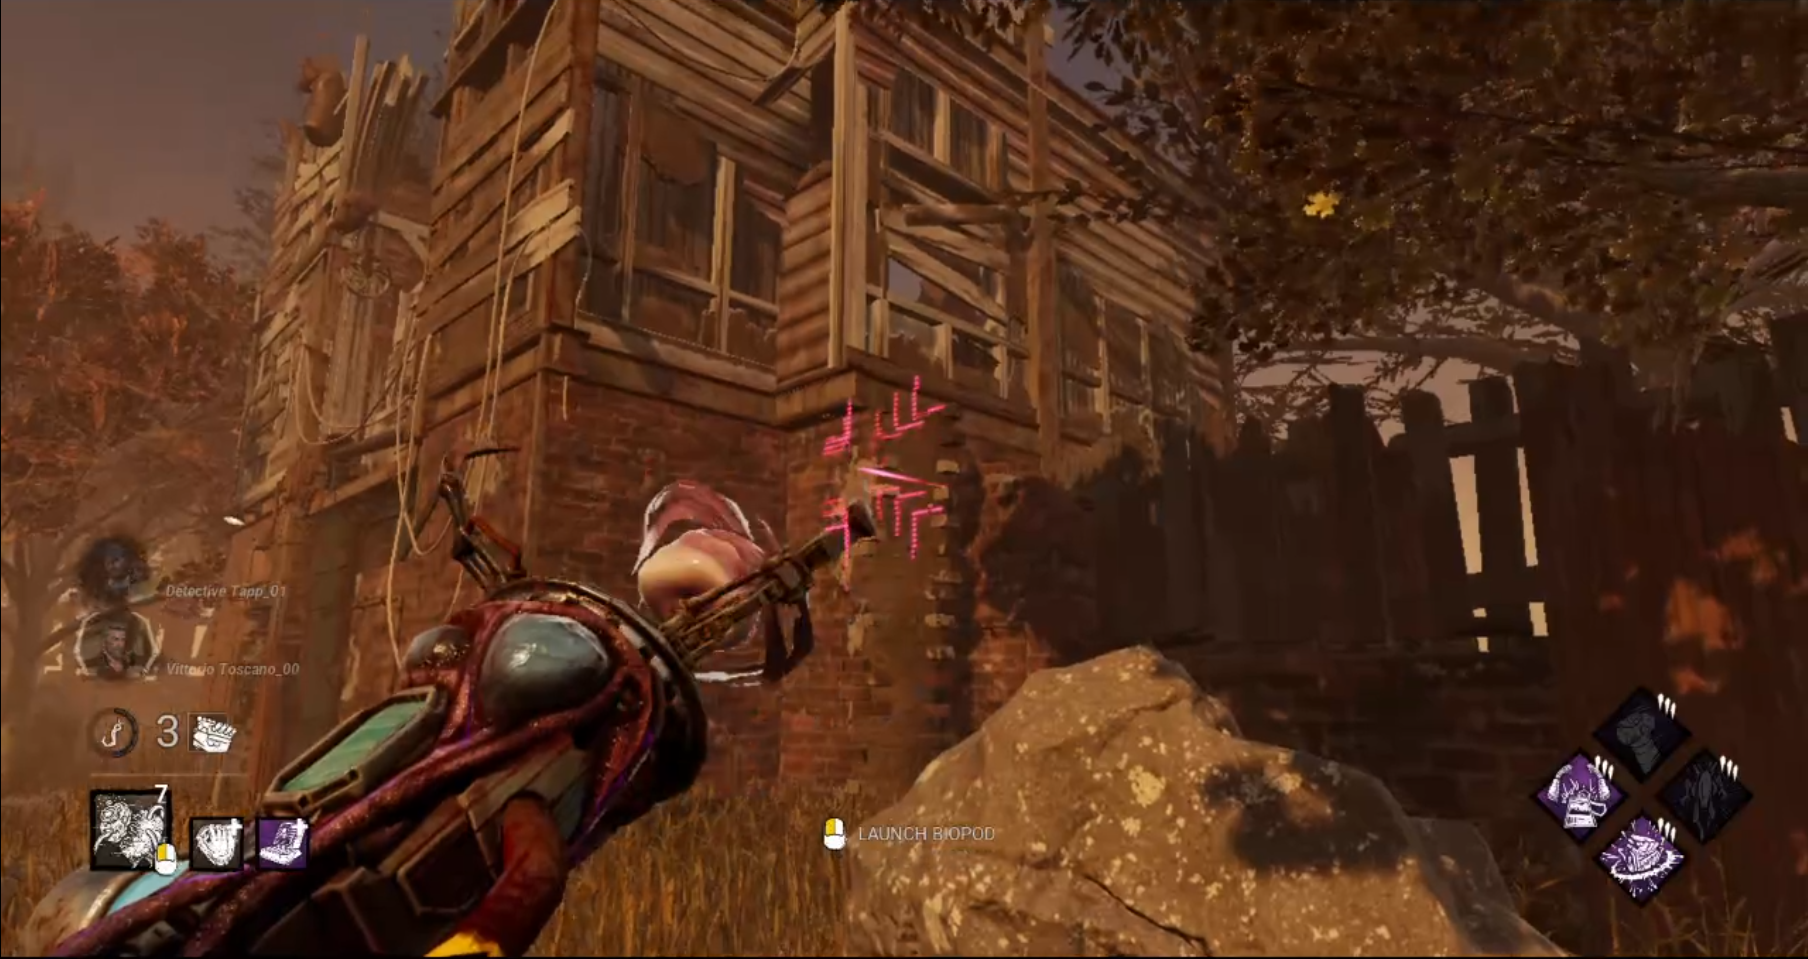
Failed pod placements like that are frustrating especially if you are trying to quickly shoot one to use in chase. The last picture isn't a good pod placement anyways for a real match (it doesn't even cover the exit gate), but I'm just using it as an example and there are other places this happens in.
I don't have an issue with most of his current addons, though Ultrasonic Sensor in particular is pretty useless. While it's a fun gimmick I guess, it's not actually good. You shouldn't really ever be looking through a biopod just to listen for sounds, and ultimately you really don't need sounds either. What matters is that you can see survivors so you can tag them; whether you can hear them or not is irrelevant.
-
This was actually something that Balanced Landing used to do, where it would reduce fall stagger all the time even when you were exhausted. It was too strong and got removed.
-
They're fine. They're not as strong as the other jungle gyms but I don't think they're meant to be. I like them overall, as long as the map is not filled with them and there are stronger tiles elsewhere.
-
The Agitation change is a nerf because it removes the synergy with Starstruck.
Diversion with 3 tokens sounds funny, I'm all for it.
-
They can fix it by making FTP not count as completing a healing action so Buckle Up won't activate. This way neither perk is affected when used on its own but they can't be used together anymore.
-
Nah, they can go in the garbage for both sides.
I don't really feel the opposite idea of making them guarantee not going to a certain realm would really be useful either. You can avoid one bad map but could just as easily get another unfavorable map.
Honestly a lot of offerings in general could use an update, a lot of offerings have negligible effects and don't serve much purpose (looking at you, mist offerings) while the ones that actually matter (map offerings) are too much of an advantage. The only other ones that are really common are the offerings that don't actually directly impact the game like bloodpoint offerings or ward offerings.
-
Some info on killers since Skull Merchant:
Singularity - He shoots little spheres called Biopods onto walls which he can look through like a camera and shoot you with it, applying Slipstream. You can avoid this by breaking line of sight. Once you have Slipstream, he can shoot you again with a Biopod or shoot you directly with his gun which lets him teleport directly to you. This triggers Overclock mode and for a few seconds he gets super fast breaking/vaulting speed (+75%) and it becomes impossible to stun him (he gets built in Spirit Fury basically and only gets hindered instead of stunned). Survivors get EMP devices from crates around the map which disable his Biopods and undo the Slipstream effect.
Xenomorph - This killer crawls through tunnels beneath the map which give him good map mobility and has a tail attack which can hit at short range and has a quick charge-up (which cannot be canceled once started, so you can try to dodge it). Above the tunnel entrances are control stations for turrets which survivors take and place on the ground, these warn of the killer’s proximity and shoot flames at the killer when they are nearby. If exposed to fire for too long the Xenomorph loses the ability to use the tail attack (essentially reverts to an M1 killer, and the ability recharges again over time, it comes back faster while in a tunnel) but the turrets can be destroyed by the killer before that happens if they react quickly enough. The Xenomorph has a 32m terror radius by default but it drops to 24m while the tail attack is available and it starts crawling instead of walking making it harder to see around loops.
Chucky - He’s super tiny but actually gets to play in a 3rd person POV. He is a 4.4m/s killer but because of his small size he can hug loops more tightly than any other killer. Survivors can see his footsteps around loops to make up for his smaller size. He can enter Hidey-Ho mode which makes him undetectable but also spawns fake footsteps near survivors all across the map to confuse them (but also acts as a warning for them). During Hidey-Ho, he can vault windows faster, can vault pallets (it’s called a Scamper, he actually goes under the pallet), and he has a slice and dice attack which lets him dash quickly (it’s a little like Oni but can only be used one time before the power goes on cooldown and it’s not an instadown).
Oh, and Hillbilly and Trickster were buffed and are both much stronger now.
-
I didn’t think about this, but you’re right. They should add a 10% trap range increase to Waterlogged Shoe to offset this.
-
@Shaddoll_Serpent said:
I actually don't
https://forums.bhvr.com/dead-by-daylight/discussion/comment/3653327#Comment_3653327
I think it's the status effects combined in one package that's the problem, not either individually. And what sucks is it seems like Sloppy's not getting nerfed in that regard, and rather, being reworked to account for the reworked status effect with each tier likely applying a longer duration of Mangled.
I don't actually mind the Mangled rework though since it seems like it'll remain useful for hit n run killers while no longer being as good as just generic slowdown for killers who commit more to chases like Spirit and Slinger. Of course though I'll have to see what the actual duration is like on all of these perks and addons before I really decide if I like it or not. I'm also not sure if I agree with it counting down while hooked which is how I assume it's going to work.
Yeah, that’s what I meant, and I agree. I don’t have a problem with either on their own, but on Sloppy Butcher and addons which have both status effects together, the Hemorrhage is what’s making them too strong imo. They should just stop putting them together and remove Hemorrhage from the existing perks/addons that have both. Then keep Mangled permanent/unchanged.
Imo Gift of Pain should be the only thing that gets to keep both effects.
-
@MikaelaWantsYourBoon said:
https://forums.bhvr.com/dead-by-daylight/discussion/comment/3653608#Comment_3653608
Except all of exhaustion perks have cooldown and can't be removed while running.
Mangled is not going anywhere unless you have perks like Inner Strength. And it has no cooldown either. You can hit 2 different survivors and they both will get this effect.
So now timing will make it balanced. Because survivor is still getting effect but it's no longer staying for forever.
Mangled on its own is not that oppressive. Sloppy Butcher is oppressive because it makes healing slower AND regresses incomplete healing. That’s why I want its healing regression removed. Most addons which apply Mangled by itself are not that strong and there are several survivor healing perks that are stronger than Mangled is.
-
He’ll feel much smoother to play now and won’t be as dependent on the same addons. He feels a bit on the weaker side right now so I like these changes
-
Vigil does not affect Mangled.
It used to, but there's been no mention of them adding that back.
-
@fussy said:
https://forums.bhvr.com/dead-by-daylight/discussion/comment/3653410#Comment_3653410
Nah, it's also stupid, but in other way. Have an opportunity to easy save literally after every down should not be the case. One successful rescue can already cost the game to killer.
I don’t think it would be a huge deal as long as the speed is low enough that saves can still be countered. The current version is dumb because there isn’t enough counterplay and for a pallet save the survivor can cover 24m during the pickup animation which is too big of a radius to have reasonable counterplay. When the speed was 150 I didn’t feel that way.
-
I’d like if it was 150% speed but had a shorter exhaustion