A quick lesson on how to play Pyramid Head properly

So a few attentive people may recognise this from a comment I made yesterday (technically it was 24 minutes into today but let's not talk semantics). A couple of people suggested I make it a real post because "That's an excellent guide, very well put together." So, here I am. I've added a few more things so it's still worth a read.

This will cover what is, in my opinion, his best build and why, as well as a few tips on playing him & a few videos.

So hey, it's me- GoodBoyKaru, your friendly neighbourhood Pyramid Head main- here to give some swift Tips and Tricks(tm) to help make you a better Pyramid Head player!

For the record, this was made during DBD Patch 4.7.2

Build

PERKS

My personal favourite and imho strongest build is this:

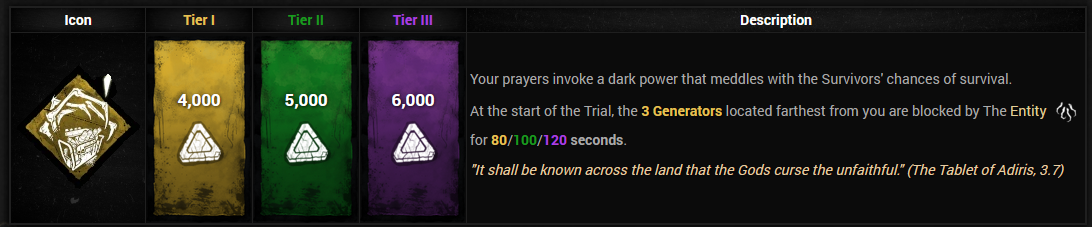
  • Corrupt Intervention
image.png

Crucial early-game slowdown on a killer without mobility, allows him to stall the game massively because survivors know that if they get found they're doomed.

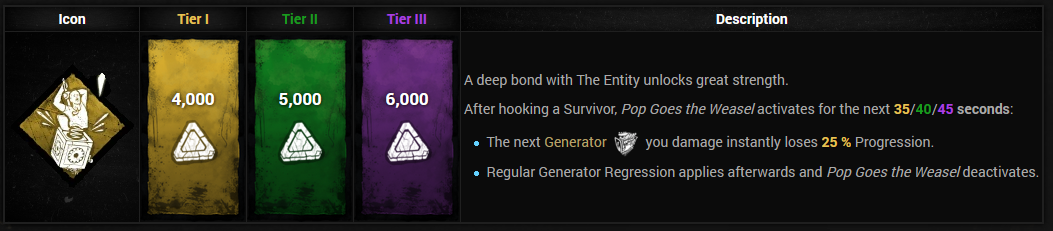
  • Pop Goes The Weasel
image.png

It's the second best gen regression perk in the game, Ruin is too volatile to be anywhere near reliable on him because, again, no movement speed, he needs gen perks because he cannot move around the map quick enough, 11/10. "But you don't hook pe-" WRONG. You should be getting plenty of value out of PGTW and if you're overcaging then you're taking your map pressure and throwing it out the window.

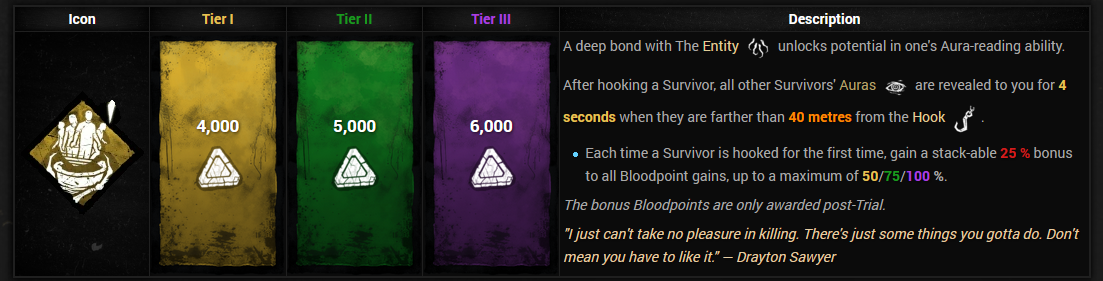
  • Barbeque and Chili
image.png

Now, you could obviously put other perks here like Infectious Fright (amazing snowball), Tinkerer (Undetectable is nice and it helps tell you where to go but again no movement speed) or Discordance (amazing info, can sometimes do nothing about it). However I say BBQ because I like the perk and also because bloodpoints.

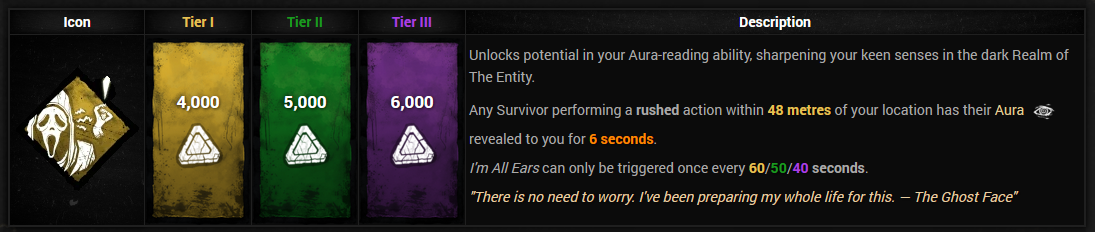
  • I'm All Ears
image.png

Hands down the best perk in the game for Pyramid Head, that's six seconds of wallhacks. I cannot stress how valuable this is with his power- that is a guaranteed free hit in 9/10 situations. To show what I mean, I've linked a timestamped video below of where IAE comes in so clutch- continues to 5:16 in the video.

https://www.youtube.com/watch?v=XJs4rvkppqs&t=296s

(you can watch the whole thing if you really want I'm proud of the game).

An honourable mention here goes to Ruin/Undying over Pop/Corrupt. As I've mentioned before, Tinkerer isn't a great perk on him due to his lack of speed, but the same goes for Ruin/Undying. You don't have the map mobility to defend your totems, especially if they spawn further away, and you'll probably end up losing two perks before 2 gens go. Corrupt/Pop is just more consistent in my experience.

ADD-ONS

So, his add-ons aren't great. The best ones, by far, are range add-ons which, when combined, extend his POTD by up to 2.5m (10.5m total). These are Burning Man Painting (Rare), Wax Doll (Uncommon), and Black Strap (Common), which ass +1.5m, +1m, and +0.5m respectively.

tips

Okay so rule number one is to not break pallets. Sounds weird but, just trust me.

His power is incredibly strong in a chase- so much so that if a survivor commits to an animation they die. If you don't break pallets (with some exceptions like God pallets) you can do amazing things. Because who doesn't want more opportunities to win a chase, like, instantly? It turns incredibly safe pallets into death sentences

To show what I mean, here's another timestamped clip. Ends at 10:58

https://www.youtube.com/watch?v=gu3X5o9GpjY&t=646s

Learn the range of the power. 8m is specific and sometimes you think you can hit things and you can't. You need to be very careful, especially when playing with range add-ons for so long, because it can and will screw with your perception.

Adapt to the survivors you're facing. A lot of players will fake taking an animation, go to the side slightly to bait your POTD or your cancel, and then commit to the animation. If you turn to the side and release, you'll catch a lot of these survivors out and get a hit. It's really satisfying to do. Alternatively some survivors will commit to the animations regardless, in which case you'll know to aim in the centre. Other survivors will just hold W and pre-drop pallets, in which case you know to leave them because you'll really struggle catching up, or do not use your power.

I cannot stress that enough. If a survivor is pre-dropping W key gaming, do not use your power. M1 killer them.

Don't overcage and don't stress about torment. If a survivor loops you, they'll get tormented. That's just kinda how it works- you stick your knife in, follow them around a loop, and release your POTD after tracking their movements.

To see what I mean we return to the first video, again timestamped. Clip ends at 1:36.

https://www.youtube.com/watch?v=XJs4rvkppqs&t=83s

See how I hug the car, turn the camera and use the power to hit him out of animation lock? Had he kept running, easy torment too.

In my opinion, only cage someone in one of four scenarios:

  • You're afraid of a DS (just please don't tunnel I'm begging you)
  • You're afraid of an Unbreakable (much more likely)
  • You can immidiately get into another chase
  • It would place you into a Pressure Point Of No Return (name pending).

What I mean by that last point is that there comes a time in a DBD game where the killer will hit a Pressure Point Of No Return, where the survivors physically cannot come back from the amount of pressure and momentum you're building. The best example of this as Pyramid Head is where you split the map through cages. You have two downed survivors. Cage one, hook the other. Nobody is on a generator, you have a BBQ proc to interrupt the person saving the cage or the hook, and now the last person must save both people. On especially large maps, like Mother's Dwelling, or multi-storied ones, like Midwich, this can force people into second stage and you've won the game at 5 gens. It's more common than you'd think.

If you cage at other times you're probably wasting pressure you could've gotten from a hook.

Learn where you can and can't lay trails. In front of totems and lockers? Amazing. In front of a gen? Not at all, it becomes a Restricted Trail Element and disappears after a few seconds. The DBD Wiki has a section on this which I'll just paste below.
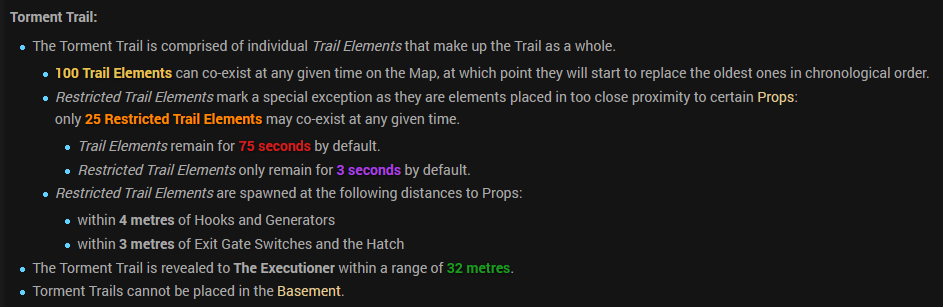
image.png

I'd highly, highly suggest reading the wiki page on his power as it's really useful in understanding the fundamentals and giving actual values to words. Here it is:

Pyramid Head or "The Executioner" is one of 23Killers currently featured inDead by Daylight . He was introduced as the Killer of CHAPTER XVI: Silent Hill, a Chapter DLC released on 16 June of 2020. 1 Overview 2 Lore 3 The Executioner's Perks 4 Load-out 4.1 Weapon: Great Knife 4.2 Power: Rites of Judgement 4.2.1 Power Trivia 4.3 Add-ons for Rites of Judgement 5 Achievements 6 Customisation 6.1 Default 6.2 Prestige 6.3 In-Game Store 6.3.1 Outfits 7 DLC 8 Change Log 8.1 Patch 4.3.0 9 Trivia 10 Gall

Finally, learn where you can and can't use POTD. It sounds like a simple thing but learning where you can and can't use it, however there's a lot to it. For example, learning how vertical changes affect it. Did you know if you release his power on a slope going up it'll fail, same with releasing it on a slope going down. However, if you're barely off of the slope it'll travel down it, but only if it isn't too steep.

It's nuts but knowing where you can and can't actually have an ability is, funnily enough, pretty important.

A few more quick-fire tips:

  • Don't just go for animation lock shots. People expect these and adapt. Be unpredictable to catch them off guard and get easy hits. Like this:
https://www.youtube.com/watch?v=0U1k10I-zG4&feature=emb_logo

Bet they didn't expect that one :p

Needless to say that was where I hit a Pressure Point Of No Return and poor Jakey couldn't pick up the scraps.

  • Don't spam his power. You waste too much time. Be precise, predict, and adapt to your opponents.
  • Don't spam his trails. You move at 110% and you already lack a movement ability, you waste too much time.
  • Tunneling isn't the best strategy. I know it seems like it because cages but again, you do not have a movement ability. Survivors can and will facefuck generators and ruin your day substantially.
  • Dead Dawg Saloon and Hawkins are both maps you never press M2 on ever. Play like a default M1 killer because the map design prevents you from using your power. They're pretty much auto-loss maps, ngl, unless the survivors really badly mess up.
  • Play survivor. Learn where survivors move and how they path, shoot POTD to hit them. That's what I did in that last clip.

And, yeah, that's about it. If people have any questions please let me know and I'll try to answer them as best I can, though I think this is comprehensive enough.

Comments

  • @GoodBoyKaru said:

    https://forum.deadbydaylight.com/en/discussion/comment/2724357#Comment_2724357

    Honestly noed really doesn't go well with his power. Like, at all- using it and relying on it turns you into the zoning creature that everyone expects you to be, getting rid of a lot of free hits through survivors just not expecting you to do things, since you'll want the M1 for the insta-down. Hell if survivors know you have it they'll force themselves into animation locks to tempt you into using your power on them so they get a speed boost to run away.

    In terms of the actual endgame itself, though, outside of just hoping the matchmaking gives you teams relative to your skill level, it's possible to substitute out a perk for No Way Out. You should still be hooking people, definitely if you continue to use BBQ, so you should get that 60 second gate block. Alternatively, a friend of mine uses M&A instead of Corrupt to help lessen survivor reaction time and thus weaken the W key meta.

    I guess it's just kinda a case of... Idk, practicing? It took me near enough a year to get to a point I felt comfortable making that guide and I know now I'm leagues above where I was when I made it. Practice makes perfect, and the more you play the better you'll be.

    However, if you find yourself relying on NOED to get kills (and not like get a third after already killing two, I mean no kills and noed saves your ass) I would absolutely take it off. Irl artificially inflate your MMR so the system pairs you with stronger and stronger survivors, and you'll limit your room for growth because you'll always have that perk to fall back on. Not to mention you won't get it's assistance when you truly need it- vs the coordinated SWF groups.

    So, uh, yeah. I guess practicing? Watching over your own gameplay if that's an option can help you realise where you made a mistake, and learn from it. However, don't beat yourself up over mistakes!! It's okay to fail, it's a video game, and if you beat yourself up over missing a POTD for example it'll just leave you feeling demoralised and #########.

    Sorry for the rant, I haven't actually slept in like over a day at this point and my brain is a mess 🏃

    Thank you!

  • You know what's funny? I wanted to play ph but also wanted I'm all ears for him so I got gf too.

    Never thought I would enjoy playing ghostface as well but now I enjoy both lmao.


    Also really appreciate detailed guide, it will help a lot. Looking forward to your new one.

  • Definitely a good beginner guide for pyramid. Some advanced tips could be probably added like where you can make a trick shot or how to face certain loops scenarios with your Punishment of the Damned. I was suprised when i realized i could shoot through the inner side of the school bus f.e. and hit people even when visually it appears like a ramp and height difference that would not work. I played Pyramid for a month now but not sure i found all of them.

    My experience so far:

    For the perks i got decent value so far with Infectious, Lethal, No Way Out, Im all Ears, Corrupt, Pain Resonance, Plaything.

    Im All Ears is a good perk and a fun one on him no question but every now and then i felt like its done nothing the whole game, because the survivors were going for loops which had to less of a visual blockade or the predictions where to go next in a chase were for both sides simply to obvious or the actual survivors are just smart enough on a certain level and can predict the short path your trying to take anyway in a hold w situation. So the usage for most comes back to loops with high walls from my experience with a physical barrier (dropped pallet / window). Once they figuered out that you have the perk, which is not hard since every second pyramid head use it, they can build distance to the wall, play a bit of a back and forth if necessary use dead hard. Its a bit of a 50/50 in those situation vs good survivors if the perk ends up getting you value and for the case that they holding w you can only watch their ass wiggle with the wall hack ability.

    My current build for efficiency is:

    Corrupt, simply necessary in the times of gen rush otherwise you loose 2-3 gens. Still do not think it will carry yourself, a good team can do all gens in 4-7mins under pressure while a casual one take up to 9-10mins.

    Pain Resonance which works like a tiny BBQ if someone screams but with the advantage of defending and regressing gens from afar which is needed because of the low mobility. It would be interesting to see how Pop does in comparison but i do not have the clown teachables yet, i still dont think it can keep up with it unless your playstyle is to tunnel the first person as fast as you can.

    Plaything is something i just recently swapped in as a midgame perk simply to deflect people from gens, works quite decent but i need more games to see if i keep and recommend it.

    No Way Out seems to me like the best endgame perk you can have on Pyramid Head so far. Most often its fairly easy to reach the 4 tokens to squeeze out the most efficiency and which can give you the time for like 2 extra downs, which usually leads to mori a person and getting someone else hooked. I only can remember one time in the past 200 games when i got less then 3 tokens only which was on RPD against a swf who were doing an escape streak challenge with an average of 8-10 times more playtime then me.

    Somewhat helpful:

    Lethal Persuer: In Connection with Corrupt its decent, you get a quick chase but only depending if this chase will be a quick down you will actually get value from it which is knowing which gen has been worked on relative to blocked gens and spawning positions and ruin the early game progress they have done so far if you can. Also most survivors dont even hide or even want to get chased immediatly. Most often the perk does to less to be justified.

    Infectious Fright: Was one of the first perks i used, now in retrospect it formost changed games from 3k to slugged 4k (because for some sadistic reason they always ran into the area of the last survivor) and helped to pick up chases immediately when you cage people. The people you uncover will be formost people with flashlights, sabotools or body blockers from my experience nearby which are most often noticeable and bypassable with his power anyway. The people who are bold enough who want to challenge you the hook stage are usually inefficient for gen progress in the team and a decent loopers which makes them unattractive to chase anyway. And since i have a lot of hooking perks meanwhile i dont go for caging that often anyway.

    I tried and dropped Tinkerer, Ruin, Undying and Deadlock since they were not consistently helpful.

    Tinkerer, Discordance, Deadlock: Most often you will know which gen is worked on with these perks but you have no time to be there before the gens pops anyway or to defend it.

    Ruin & Undying: Ruin feels like it has a realistic lasting time in the boon era between 5s and 2mins in 1 of 100 games it will last until the end. Undying does not effect the up-time of that perk noticeable.

  • I feel his build repertoire has opened up significantly over the past year with valid options when it comes to perks, there's two builds i like to use with him.

    I'm all Ears / Pop / Call of Brine / Floods of rage - Depending on scourge hook locations of course but people don't expect floods of rage in comparison to bbq. Pop and i'm all ears for obvious reasons, Call of brine is fantastic, tells you if someone is there and pretty good regression.


    Agitation / Pain Resonance / Ruin or Plaything / Pentimento - Has worked pretty well for me, first two perks combo well and pretty much guarantee it unless you get screwed by scourge hook locations, With ruin or plaything they will put in work before they get broken, which you want anyway to take advantage of Pentimento. I would opt for plaything though, more chances of applying 1 stack of pentimento, plus oblivious. Ruin if you favour regression and prey it doesn't get broken before you get value from it.

  • @CrowVortex said:

    I feel his build repertoire has opened up significantly over the past year with valid options when it comes to perks, there's two builds i like to use with him.

    I'm all Ears / Pop / Call of Brine / Floods of rage - Depending on scourge hook locations of course but people don't expect floods of rage in comparison to bbq. Pop and i'm all ears for obvious reasons, Call of brine is fantastic, tells you if someone is there and pretty good regression.

    Agitation / Pain Resonance / Ruin or Plaything / Pentimento - Has worked pretty well for me, first two perks combo well and pretty much guarantee it unless you get screwed by scourge hook locations, With ruin or plaything they will put in work before they get broken, which you want anyway to take advantage of Pentimento. I would opt for plaything though, more chances of applying 1 stack of pentimento, plus oblivious. Ruin if you favour regression and prey it doesn't get broken before you get value from it.

    The problem with those is that I just don't think he meshes with Scourge Hooks. The cages/Final Judgement take away so much value and either makes your torment weaker (already being difficult to apply + then you get 0 value from it) and opens you up for flashlight saves, or you miss up to a potential 8 different SH procs if everything goes right, the stars align, and you've been blessed by every luck deity known to mankind. Out of the perks that have released since this guide- so we're counting Nemesis to Sadako- only 2 have any real value imho: Call of Brine, and Deadlock.

    I'm currently playing around with them- like trying out COB/PGTW/Corrupt/IAE or Corrupt/PGTW/Deadlock/IAE (gee you could never tell which perks I prefer could you)- or some other perks like Infectious, Monitor, etc (which is why I'm planning to make an updated guide, it's just taking me an eternity).

    But honestly so far with my playtesting I stand by this guide; Corrupt/PGTW is the most consistent build core, even if not the best, and I don't think any Scourge Hook perk will change this because they give far less value, and are also much more inconsistent.

  • @Sisi said:

    https://forum.deadbydaylight.com/en/discussion/comment/2209032#Comment_2209032

    Aah samoyed, all i needed to see today 💕 great job with this guide

    they are blessed creatures

    image.png


  • @GoodBoyKaru said:

    So a few attentive people may recognise this from a comment I made yesterday (technically it was 24 minutes into today but let's not talk semantics). A couple of people suggested I make it a real post because "That's an excellent guide, very well put together." So, here I am. I've added a few more things so it's still worth a read.

    This will cover what is, in my opinion, his best build and why, as well as a few tips on playing him & a few videos.

    So hey, it's me- GoodBoyKaru, your friendly neighbourhood Pyramid Head main- here to give some swift Tips and Tricks(tm) to help make you a better Pyramid Head player!

    For the record, this was made during DBD Patch 4.7.2

    Build

    PERKS

    My personal favourite and imho strongest build is this:

    • Corrupt Intervention

    https://us.v-cdn.net/6030815/uploads/5A01IV8RME2M/image.png

    Crucial early-game slowdown on a killer without mobility, allows him to stall the game massively because survivors know that if they get found they're doomed.

    • Pop Goes The Weasel

    https://us.v-cdn.net/6030815/uploads/FHA7ZFNAKVZY/image.png

    It's the second best gen regression perk in the game, Ruin is too volatile to be anywhere near reliable on him because, again, no movement speed, he needs gen perks because he cannot move around the map quick enough, 11/10. "But you don't hook pe-" WRONG. You should be getting plenty of value out of PGTW and if you're overcaging then you're taking your map pressure and throwing it out the window.

    • Barbeque and Chili

    https://us.v-cdn.net/6030815/uploads/SC8THLXSY3RP/image.png

    Now, you could obviously put other perks here like Infectious Fright (amazing snowball), Tinkerer (Undetectable is nice and it helps tell you where to go but again no movement speed) or Discordance (amazing info, can sometimes do nothing about it). However I say BBQ because I like the perk and also because bloodpoints.

    • I'm All Ears

    https://us.v-cdn.net/6030815/uploads/V90CSL0I44NO/image.png

    Hands down the best perk in the game for Pyramid Head, that's six seconds of wallhacks. I cannot stress how valuable this is with his power- that is a guaranteed free hit in 9/10 situations. To show what I mean, I've linked a timestamped video below of where IAE comes in so clutch- continues to 5:16 in the video.

    https://www.youtube.com/watch?v=XJs4rvkppqs&t=296s

    (you can watch the whole thing if you really want I'm proud of the game).

    An honourable mention here goes to Ruin/Undying over Pop/Corrupt. As I've mentioned before, Tinkerer isn't a great perk on him due to his lack of speed, but the same goes for Ruin/Undying. You don't have the map mobility to defend your totems, especially if they spawn further away, and you'll probably end up losing two perks before 2 gens go. Corrupt/Pop is just more consistent in my experience.

    ADD-ONS

    So, his add-ons aren't great. The best ones, by far, are range add-ons which, when combined, extend his POTD by up to 2.5m (10.5m total). These are Burning Man Painting (Rare), Wax Doll (Uncommon), and Black Strap (Common), which ass +1.5m, +1m, and +0.5m respectively.

    tips

    Okay so rule number one is to not break pallets. Sounds weird but, just trust me.

    His power is incredibly strong in a chase- so much so that if a survivor commits to an animation they die. If you don't break pallets (with some exceptions like God pallets) you can do amazing things. Because who doesn't want more opportunities to win a chase, like, instantly? It turns incredibly safe pallets into death sentences

    To show what I mean, here's another timestamped clip. Ends at 10:58

    https://www.youtube.com/watch?v=gu3X5o9GpjY&t=646s

    Learn the range of the power. 8m is specific and sometimes you think you can hit things and you can't. You need to be very careful, especially when playing with range add-ons for so long, because it can and will screw with your perception.

    Adapt to the survivors you're facing. A lot of players will fake taking an animation, go to the side slightly to bait your POTD or your cancel, and then commit to the animation. If you turn to the side and release, you'll catch a lot of these survivors out and get a hit. It's really satisfying to do. Alternatively some survivors will commit to the animations regardless, in which case you'll know to aim in the centre. Other survivors will just hold W and pre-drop pallets, in which case you know to leave them because you'll really struggle catching up, or do not use your power.

    I cannot stress that enough. If a survivor is pre-dropping W key gaming, do not use your power. M1 killer them.

    Don't overcage and don't stress about torment. If a survivor loops you, they'll get tormented. That's just kinda how it works- you stick your knife in, follow them around a loop, and release your POTD after tracking their movements.

    To see what I mean we return to the first video, again timestamped. Clip ends at 1:36.

    https://www.youtube.com/watch?v=XJs4rvkppqs&t=83s

    See how I hug the car, turn the camera and use the power to hit him out of animation lock? Had he kept running, easy torment too.

    In my opinion, only cage someone in one of four scenarios:

    • You're afraid of a DS (just please don't tunnel I'm begging you)
    • You're afraid of an Unbreakable (much more likely)
    • You can immidiately get into another chase
    • It would place you into a Pressure Point Of No Return (name pending).

    What I mean by that last point is that there comes a time in a DBD game where the killer will hit a Pressure Point Of No Return, where the survivors physically cannot come back from the amount of pressure and momentum you're building. The best example of this as Pyramid Head is where you split the map through cages. You have two downed survivors. Cage one, hook the other. Nobody is on a generator, you have a BBQ proc to interrupt the person saving the cage or the hook, and now the last person must save both people. On especially large maps, like Mother's Dwelling, or multi-storied ones, like Midwich, this can force people into second stage and you've won the game at 5 gens. It's more common than you'd think.

    If you cage at other times you're probably wasting pressure you could've gotten from a hook.

    Learn where you can and can't lay trails. In front of totems and lockers? Amazing. In front of a gen? Not at all, it becomes a Restricted Trail Element and disappears after a few seconds. The DBD Wiki has a section on this which I'll just paste below.

    https://us.v-cdn.net/6030815/uploads/2808XTGCLSHV/image.png

    I'd highly, highly suggest reading the wiki page on his power as it's really useful in understanding the fundamentals and giving actual values to words. Here it is:

    https://deadbydaylight.fandom.com/wiki/Pyramid_Head

    Finally, learn where you can and can't use POTD. It sounds like a simple thing but learning where you can and can't use it, however there's a lot to it. For example, learning how vertical changes affect it. Did you know if you release his power on a slope going up it'll fail, same with releasing it on a slope going down. However, if you're barely off of the slope it'll travel down it, but only if it isn't too steep.

    It's nuts but knowing where you can and can't actually have an ability is, funnily enough, pretty important.

    A few more quick-fire tips:

    • Don't just go for animation lock shots. People expect these and adapt. Be unpredictable to catch them off guard and get easy hits. Like this:

    https://www.youtube.com/watch?v=0U1k10I-zG4&feature=emb_logo

    Bet they didn't expect that one :p

    Needless to say that was where I hit a Pressure Point Of No Return and poor Jakey couldn't pick up the scraps.

    • Don't spam his power. You waste too much time. Be precise, predict, and adapt to your opponents.
    • Don't spam his trails. You move at 110% and you already lack a movement ability, you waste too much time.
    • Tunneling isn't the best strategy. I know it seems like it because cages but again, you do not have a movement ability. Survivors can and will facefuck generators and ruin your day substantially.
    • Dead Dawg Saloon and Hawkins are both maps you never press M2 on ever. Play like a default M1 killer because the map design prevents you from using your power. They're pretty much auto-loss maps, ngl, unless the survivors really badly mess up.
    • Play survivor. Learn where survivors move and how they path, shoot POTD to hit them. That's what I did in that last clip.

    And, yeah, that's about it. If people have any questions please let me know and I'll try to answer them as best I can, though I think this is comprehensive enough.

    Hey, I just wanted to thank you properly. Some time ago you helped me with your Pyramid guide and now I'm a very happy Pyramid main and getting great results with him. Im very, very hyped on seeing your updated guide.

    Anyway, I also wanted to contribute some, though I'm obviously nowhere as experienced as everyone else, but I have been experimenting with a lot of different perk and addon combinations and I have found one that has proven to be very, very fun. I dont know how effective it would be on the highest echelon of MMR, but it has worked very well for me and mixes up the game quite a bit.

    It is a hex only build I like to call the "torturer build"

    It consists of Hex: Plaything, Hex: pentimento, Hex: thrill of the hunt and Hex: Ruin.

    Combined with mannequin foot and music box, which increases the duration of trails for 35 seconds total.

    The general idea is to use the extra durable trails to guard your totems, with thrill of the hunt giving you enough time to actually get to where the survivor is in case it happens far away.

    At the start, you move quickly to trail your ruin and trill hexes. If they are close to you, swell, if they are not, you are probably moving in the general direction of the survivors anyway and might even interrupt a cleansing attempt. Then pressure people off gens, and get in a chase. granted it is a weak early game, but when you start hooking people and they get playthinged, they really start to panic. No one wants to spend the trial with oblivious, and they are already concerned with ruin. Suddenly you have them running around the map trying to cleanse ruin or the playthings and abandoning gens and putting themselves in very dangerous situations, struggling to even finish cleasing something and only succeeding when several cleansing attempts happen at the same time (I always move to protect either ruin or thrill and let the playthings go). Then the pentimentos start to go up. normally its a meh perk, but I actually get a ton of value from it because the survivors often don't want to risk cleasing them and just try to soldier through the slowdown (I find experienced players do this more, less experienced ones will actually try to cleanse those, a death sentence usually). I can often hold 2 or even 3 pentimentos and in more or less half my games ruin survives the trial or lasts for so long that they already lost.

    I find it effective, but I would love to see how it fares against the true elite of high MMR (looks intently), and either way is just so cruel and so much fun. Also very "on lore". Pyramid is all about punishing and well, you touch my hexes, I punish you.

    Like I said, I just wanted to contribute some to the Pyramid head community (though I don't know how much use this is) and express my apreciation for your oustanding work.

    I wish there where more awesome guides like this for other killers

  • I definitely like playing pyramid head but I always get people who would rather run in the open and die then get tormented it's annoying not being able to use 50% of your power

  • @humanbeing1704 said:

    I definitely like playing pyramid head but I always get people who would rather run in the open and die then get tormented it's annoying not being able to use 50% of your power

    Torment in a Loop: I find it fairly easy to torment people, at one point in a chase you will always have them zoned out around a loop and they will step on it if they stay or choose to die in the open which honestly happens rarely as the second option to me they mostly go for the chance of increased chase time.

    Torment at the End of a Chase: You can even force the torment in some scenarios when you see they cant escape you and you will get them, get real close and hug them with the Rights activated which can lead them to panic and run around you leading to them steppin into the trails.

    Hook Defence with Torment: In the case that they are not tormented you can still draw some tactical lines around the hook and pressure the unhook scenario which will usually end up getting the rescuer tormented since they want to move in the most direct way to it, and even the unhooked person when they run away. They will not have the time to run around or crouch over them if done right. This can work with each object the survivors want like totems and gens.

    Hiding Torment: Another less efficient option that you can try every now in then is to hide your torment like for example bear traps in favorable spots (usually high grass or around a corner which they might carefree run into) , every now and then this will not only torment people but also give you useful information. Like i had a game yesterday when a claudette was doing the gen in the courtyard on midwhich and my brightness settings where not optimal to check every bush there, so i just tormented the area a bit and repressured it.

    Crosspoint Torment: Less recommendabel but sometimes decent can be tormenting the middfield a bit. Mostly indoor maps, like Lerys can suprise people, the staircases of the game map or entrances to the hallway on rpd. They usually choose to get tormented over the time investment it would take to bypass it.

    Usage of Battlefield Torment: The last tip i remember is even if you have someone tormented and it would be somewhat favourable to sent them into a cage, you can look around you to watch where the remains of the trails of torment from your battlefield of the chase are and find a favourable hook instead. Mostly the battlefield torment is more random and have a decent chance of catching people off guard.

  • @GoodBoyKaru said:

    So a few attentive people may recognise this from a comment I made yesterday (technically it was 24 minutes into today but let's not talk semantics). A couple of people suggested I make it a real post because "That's an excellent guide, very well put together." So, here I am. I've added a few more things so it's still worth a read.

    This will cover what is, in my opinion, his best build and why, as well as a few tips on playing him & a few videos.

    So hey, it's me- GoodBoyKaru, your friendly neighbourhood Pyramid Head main- here to give some swift Tips and Tricks(tm) to help make you a better Pyramid Head player!

    For the record, this was made during DBD Patch 4.7.2

    Build

    PERKS

    My personal favourite and imho strongest build is this:

    • Corrupt Intervention

    https://us.v-cdn.net/6030815/uploads/5A01IV8RME2M/image.png

    Crucial early-game slowdown on a killer without mobility, allows him to stall the game massively because survivors know that if they get found they're doomed.

    • Pop Goes The Weasel

    https://us.v-cdn.net/6030815/uploads/FHA7ZFNAKVZY/image.png

    It's the second best gen regression perk in the game, Ruin is too volatile to be anywhere near reliable on him because, again, no movement speed, he needs gen perks because he cannot move around the map quick enough, 11/10. "But you don't hook pe-" WRONG. You should be getting plenty of value out of PGTW and if you're overcaging then you're taking your map pressure and throwing it out the window.

    • Barbeque and Chili

    https://us.v-cdn.net/6030815/uploads/SC8THLXSY3RP/image.png

    Now, you could obviously put other perks here like Infectious Fright (amazing snowball), Tinkerer (Undetectable is nice and it helps tell you where to go but again no movement speed) or Discordance (amazing info, can sometimes do nothing about it). However I say BBQ because I like the perk and also because bloodpoints.

    • I'm All Ears

    https://us.v-cdn.net/6030815/uploads/V90CSL0I44NO/image.png

    Hands down the best perk in the game for Pyramid Head, that's six seconds of wallhacks. I cannot stress how valuable this is with his power- that is a guaranteed free hit in 9/10 situations. To show what I mean, I've linked a timestamped video below of where IAE comes in so clutch- continues to 5:16 in the video.

    https://www.youtube.com/watch?v=XJs4rvkppqs&t=296s

    (you can watch the whole thing if you really want I'm proud of the game).

    An honourable mention here goes to Ruin/Undying over Pop/Corrupt. As I've mentioned before, Tinkerer isn't a great perk on him due to his lack of speed, but the same goes for Ruin/Undying. You don't have the map mobility to defend your totems, especially if they spawn further away, and you'll probably end up losing two perks before 2 gens go. Corrupt/Pop is just more consistent in my experience.

    ADD-ONS

    So, his add-ons aren't great. The best ones, by far, are range add-ons which, when combined, extend his POTD by up to 2.5m (10.5m total). These are Burning Man Painting (Rare), Wax Doll (Uncommon), and Black Strap (Common), which ass +1.5m, +1m, and +0.5m respectively.

    tips

    Okay so rule number one is to not break pallets. Sounds weird but, just trust me.

    His power is incredibly strong in a chase- so much so that if a survivor commits to an animation they die. If you don't break pallets (with some exceptions like God pallets) you can do amazing things. Because who doesn't want more opportunities to win a chase, like, instantly? It turns incredibly safe pallets into death sentences

    To show what I mean, here's another timestamped clip. Ends at 10:58

    https://www.youtube.com/watch?v=gu3X5o9GpjY&t=646s

    Learn the range of the power. 8m is specific and sometimes you think you can hit things and you can't. You need to be very careful, especially when playing with range add-ons for so long, because it can and will screw with your perception.

    Adapt to the survivors you're facing. A lot of players will fake taking an animation, go to the side slightly to bait your POTD or your cancel, and then commit to the animation. If you turn to the side and release, you'll catch a lot of these survivors out and get a hit. It's really satisfying to do. Alternatively some survivors will commit to the animations regardless, in which case you'll know to aim in the centre. Other survivors will just hold W and pre-drop pallets, in which case you know to leave them because you'll really struggle catching up, or do not use your power.

    I cannot stress that enough. If a survivor is pre-dropping W key gaming, do not use your power. M1 killer them.

    Don't overcage and don't stress about torment. If a survivor loops you, they'll get tormented. That's just kinda how it works- you stick your knife in, follow them around a loop, and release your POTD after tracking their movements.

    To see what I mean we return to the first video, again timestamped. Clip ends at 1:36.

    https://www.youtube.com/watch?v=XJs4rvkppqs&t=83s

    See how I hug the car, turn the camera and use the power to hit him out of animation lock? Had he kept running, easy torment too.

    In my opinion, only cage someone in one of four scenarios:

    • You're afraid of a DS (just please don't tunnel I'm begging you)
    • You're afraid of an Unbreakable (much more likely)
    • You can immidiately get into another chase
    • It would place you into a Pressure Point Of No Return (name pending).

    What I mean by that last point is that there comes a time in a DBD game where the killer will hit a Pressure Point Of No Return, where the survivors physically cannot come back from the amount of pressure and momentum you're building. The best example of this as Pyramid Head is where you split the map through cages. You have two downed survivors. Cage one, hook the other. Nobody is on a generator, you have a BBQ proc to interrupt the person saving the cage or the hook, and now the last person must save both people. On especially large maps, like Mother's Dwelling, or multi-storied ones, like Midwich, this can force people into second stage and you've won the game at 5 gens. It's more common than you'd think.

    If you cage at other times you're probably wasting pressure you could've gotten from a hook.

    Learn where you can and can't lay trails. In front of totems and lockers? Amazing. In front of a gen? Not at all, it becomes a Restricted Trail Element and disappears after a few seconds. The DBD Wiki has a section on this which I'll just paste below.

    https://us.v-cdn.net/6030815/uploads/2808XTGCLSHV/image.png

    I'd highly, highly suggest reading the wiki page on his power as it's really useful in understanding the fundamentals and giving actual values to words. Here it is:

    https://deadbydaylight.fandom.com/wiki/Pyramid_Head

    Finally, learn where you can and can't use POTD. It sounds like a simple thing but learning where you can and can't use it, however there's a lot to it. For example, learning how vertical changes affect it. Did you know if you release his power on a slope going up it'll fail, same with releasing it on a slope going down. However, if you're barely off of the slope it'll travel down it, but only if it isn't too steep.

    It's nuts but knowing where you can and can't actually have an ability is, funnily enough, pretty important.

    A few more quick-fire tips:

    • Don't just go for animation lock shots. People expect these and adapt. Be unpredictable to catch them off guard and get easy hits. Like this:

    https://www.youtube.com/watch?v=0U1k10I-zG4&feature=emb_logo

    Bet they didn't expect that one :p

    Needless to say that was where I hit a Pressure Point Of No Return and poor Jakey couldn't pick up the scraps.

    • Don't spam his power. You waste too much time. Be precise, predict, and adapt to your opponents.
    • Don't spam his trails. You move at 110% and you already lack a movement ability, you waste too much time.
    • Tunneling isn't the best strategy. I know it seems like it because cages but again, you do not have a movement ability. Survivors can and will facefuck generators and ruin your day substantially.
    • Dead Dawg Saloon and Hawkins are both maps you never press M2 on ever. Play like a default M1 killer because the map design prevents you from using your power. They're pretty much auto-loss maps, ngl, unless the survivors really badly mess up.
    • Play survivor. Learn where survivors move and how they path, shoot POTD to hit them. That's what I did in that last clip.

    And, yeah, that's about it. If people have any questions please let me know and I'll try to answer them as best I can, though I think this is comprehensive enough.

    Just saying, the clips of Pyramid are pretty old and his power isnt that good as it used to be, but other than that good guide

  • @NemmyMan3000 said:

    https://forum.deadbydaylight.com/en/discussion/251317/a-quick-lesson-on-how-to-play-pyramid-head-properly

    Just saying, the clips of Pyramid are pretty old and his power isnt that good as it used to be, but other than that good guide

    > Post made May 2021

    I wonder why the clips are old

  • @humanbeing1704 said:

    I definitely like playing pyramid head but I always get people who would rather run in the open and die then get tormented it's annoying not being able to use 50% of your power

    If they don't loop you and just w key then good luck trying to torment them lol. Only real consistent way is the "place it at the loop and then don't kill them too quickly" but you can always hope someone steps in it randomly.

    Another fun thing you can do is to place torment outside of a locker if you suspect someone to be in there; if they are, they either come out and get tormented or they're useless to their team for a while

  • @GoodBoyKaru

    Which build are you currently running on ph?

  • @Shaped said:

    @GoodBoyKaru

    Which build are you currently running on ph?

    Currently still the same as in this post, but when I get some free time I'm gonna actually do some more experimenting with newer perks again. Not got the most amount of time to myself rn sadly lol

  • @GoodBoyKaru said:

    https://forum.deadbydaylight.com/en/discussion/comment/2930849#Comment_2930849

    Currently still the same as in this post, but when I get some free time I'm gonna actually do some more experimenting with newer perks again. Not got the most amount of time to myself rn sadly lol

    I am asking mainly because of the pop. Wanted to see if you switched it for some of the more recent gen regression perks.

  • @Shaped said:

    https://forum.deadbydaylight.com/en/discussion/comment/2931031#Comment_2931031

    I am asking mainly because of the pop. Wanted to see if you switched it for some of the more recent gen regression perks.

    Nah for the moment I still vibe with the Corrupt/Pop core because it's proven itself to me and 4 perk slots is really limiting lol. First perk to go is probably BBQ for Call Of Brine or Deadlock but that needs me to give up bloodpoints

  • Thank you, very cool!

    I've been enjoying PH a ton recently so I found this at the perfect time. I haven't played him in so long despite him inspiring my name

  • Guides like these are gold. Kudos. I'm currently terrorizing survs with:

    Deathbound/Hex: Ruin/Plaything/Pentimento

  • A+, well done.

  • I recently started playing Pyramid Head in earnest again and he is just so much fun, once you learn how his power works.

    The build I am using right now isn't very synergystic, but its improving his overall performance.

    BBQ, Scourge: Pain Res, Agitation, Darkness Revealed.

    Basically I roam around, occasional check lockers and once I down someone I can pretty much every time hook them on a scourge hook. BBQ could possibly be phased out against something more useful once it doesn't provide bonus BP anymore, but until that time I am just too addicted.

    For a couple of games I switched it for Shatter Hope just for the lulz, and when you stomp a boon into smithereens its just so satisfying, but I feel that I don't get always value out of it. Still, I hate boons enough that I might just keep it, once the big change hits us.


    In my last game I had a perfect Pyramid Head moment. Had a survivor on hook, while leaving the hook I noticed scratch marks and chases the wannabe unhooker around the gym. After a round they throw a pallet and run for the unhook: I calmly plant my sword in the ground, take aim and BOOM! Double KO! :D The unhooked survivor instantly DCed, the other squirmed in the "no no no" thingy on the ground, and I actually showed mercy and just left her there, to be picked up by the others.

  • Everyone knows that Pyramidhead has issues with his add-ons. You can pretty much use whatever you want, because nothing really matters besides the range add-ons .. or does it?

    I looked them over again and was rather disappointed with most. Especially the Iri-add-ons were epic-meh. And then suddenly it hit me!!!

    Behold the mighty, purple Crimson Ceremony Book! With the recent changes to Hemorrhage this thing is just beastly af!

    What does this thing? Well, everyone affected by Torment will now suffer Hemorrhage semi-permanent, bleeding away their incompleted healing progress at an alarming rate until you cage them. This is just such a nice debuff, that I am all giddy.

  • PUnishment of the DAmned requires commitment. You need to know they are commiting to an action meaning you need to predict the commitment, meaning you need to already be using your power so that you can charge the attack. IF you do on reaction rather than prediction you'll always miss cause you're slower.

  • @GoodBoyKaru said:

    So a few attentive people may recognise this from a comment I made yesterday (technically it was 24 minutes into today but let's not talk semantics). A couple of people suggested I make it a real post because "That's an excellent guide, very well put together." So, here I am. I've added a few more things so it's still worth a read.

    This will cover what is, in my opinion, his best build and why, as well as a few tips on playing him & a few videos.

    So hey, it's me- GoodBoyKaru, your friendly neighbourhood Pyramid Head main- here to give some swift Tips and Tricks(tm) to help make you a better Pyramid Head player!

    For the record, this was made during DBD Patch 4.7.2

    Build

    PERKS

    My personal favourite and imho strongest build is this:

    • Corrupt Intervention

    https://us.v-cdn.net/6030815/uploads/5A01IV8RME2M/image.png

    Crucial early-game slowdown on a killer without mobility, allows him to stall the game massively because survivors know that if they get found they're doomed.

    • Pop Goes The Weasel

    https://us.v-cdn.net/6030815/uploads/FHA7ZFNAKVZY/image.png

    It's the second best gen regression perk in the game, Ruin is too volatile to be anywhere near reliable on him because, again, no movement speed, he needs gen perks because he cannot move around the map quick enough, 11/10. "But you don't hook pe-" WRONG. You should be getting plenty of value out of PGTW and if you're overcaging then you're taking your map pressure and throwing it out the window.

    • Barbeque and Chili

    https://us.v-cdn.net/6030815/uploads/SC8THLXSY3RP/image.png

    Now, you could obviously put other perks here like Infectious Fright (amazing snowball), Tinkerer (Undetectable is nice and it helps tell you where to go but again no movement speed) or Discordance (amazing info, can sometimes do nothing about it). However I say BBQ because I like the perk and also because bloodpoints.

    • I'm All Ears

    https://us.v-cdn.net/6030815/uploads/V90CSL0I44NO/image.png

    Hands down the best perk in the game for Pyramid Head, that's six seconds of wallhacks. I cannot stress how valuable this is with his power- that is a guaranteed free hit in 9/10 situations. To show what I mean, I've linked a timestamped video below of where IAE comes in so clutch- continues to 5:16 in the video.

    https://www.youtube.com/watch?v=XJs4rvkppqs&t=296s

    (you can watch the whole thing if you really want I'm proud of the game).

    An honourable mention here goes to Ruin/Undying over Pop/Corrupt. As I've mentioned before, Tinkerer isn't a great perk on him due to his lack of speed, but the same goes for Ruin/Undying. You don't have the map mobility to defend your totems, especially if they spawn further away, and you'll probably end up losing two perks before 2 gens go. Corrupt/Pop is just more consistent in my experience.

    ADD-ONS

    So, his add-ons aren't great. The best ones, by far, are range add-ons which, when combined, extend his POTD by up to 2.5m (10.5m total). These are Burning Man Painting (Rare), Wax Doll (Uncommon), and Black Strap (Common), which ass +1.5m, +1m, and +0.5m respectively.

    tips

    Okay so rule number one is to not break pallets. Sounds weird but, just trust me.

    His power is incredibly strong in a chase- so much so that if a survivor commits to an animation they die. If you don't break pallets (with some exceptions like God pallets) you can do amazing things. Because who doesn't want more opportunities to win a chase, like, instantly? It turns incredibly safe pallets into death sentences

    To show what I mean, here's another timestamped clip. Ends at 10:58

    https://www.youtube.com/watch?v=gu3X5o9GpjY&t=646s

    Learn the range of the power. 8m is specific and sometimes you think you can hit things and you can't. You need to be very careful, especially when playing with range add-ons for so long, because it can and will screw with your perception.

    Adapt to the survivors you're facing. A lot of players will fake taking an animation, go to the side slightly to bait your POTD or your cancel, and then commit to the animation. If you turn to the side and release, you'll catch a lot of these survivors out and get a hit. It's really satisfying to do. Alternatively some survivors will commit to the animations regardless, in which case you'll know to aim in the centre. Other survivors will just hold W and pre-drop pallets, in which case you know to leave them because you'll really struggle catching up, or do not use your power.

    I cannot stress that enough. If a survivor is pre-dropping W key gaming, do not use your power. M1 killer them.

    Don't overcage and don't stress about torment. If a survivor loops you, they'll get tormented. That's just kinda how it works- you stick your knife in, follow them around a loop, and release your POTD after tracking their movements.

    To see what I mean we return to the first video, again timestamped. Clip ends at 1:36.

    https://www.youtube.com/watch?v=XJs4rvkppqs&t=83s

    See how I hug the car, turn the camera and use the power to hit him out of animation lock? Had he kept running, easy torment too.

    In my opinion, only cage someone in one of four scenarios:

    • You're afraid of a DS (just please don't tunnel I'm begging you)
    • You're afraid of an Unbreakable (much more likely)
    • You can immidiately get into another chase
    • It would place you into a Pressure Point Of No Return (name pending).

    What I mean by that last point is that there comes a time in a DBD game where the killer will hit a Pressure Point Of No Return, where the survivors physically cannot come back from the amount of pressure and momentum you're building. The best example of this as Pyramid Head is where you split the map through cages. You have two downed survivors. Cage one, hook the other. Nobody is on a generator, you have a BBQ proc to interrupt the person saving the cage or the hook, and now the last person must save both people. On especially large maps, like Mother's Dwelling, or multi-storied ones, like Midwich, this can force people into second stage and you've won the game at 5 gens. It's more common than you'd think.

    If you cage at other times you're probably wasting pressure you could've gotten from a hook.

    Learn where you can and can't lay trails. In front of totems and lockers? Amazing. In front of a gen? Not at all, it becomes a Restricted Trail Element and disappears after a few seconds. The DBD Wiki has a section on this which I'll just paste below.

    https://us.v-cdn.net/6030815/uploads/2808XTGCLSHV/image.png

    I'd highly, highly suggest reading the wiki page on his power as it's really useful in understanding the fundamentals and giving actual values to words. Here it is:

    https://deadbydaylight.fandom.com/wiki/Pyramid_Head

    Finally, learn where you can and can't use POTD. It sounds like a simple thing but learning where you can and can't use it, however there's a lot to it. For example, learning how vertical changes affect it. Did you know if you release his power on a slope going up it'll fail, same with releasing it on a slope going down. However, if you're barely off of the slope it'll travel down it, but only if it isn't too steep.

    It's nuts but knowing where you can and can't actually have an ability is, funnily enough, pretty important.

    A few more quick-fire tips:

    • Don't just go for animation lock shots. People expect these and adapt. Be unpredictable to catch them off guard and get easy hits. Like this:

    https://www.youtube.com/watch?v=0U1k10I-zG4&feature=emb_logo

    Bet they didn't expect that one :p

    Needless to say that was where I hit a Pressure Point Of No Return and poor Jakey couldn't pick up the scraps.

    • Don't spam his power. You waste too much time. Be precise, predict, and adapt to your opponents.
    • Don't spam his trails. You move at 110% and you already lack a movement ability, you waste too much time.
    • Tunneling isn't the best strategy. I know it seems like it because cages but again, you do not have a movement ability. Survivors can and will facefuck generators and ruin your day substantially.
    • Dead Dawg Saloon and Hawkins are both maps you never press M2 on ever. Play like a default M1 killer because the map design prevents you from using your power. They're pretty much auto-loss maps, ngl, unless the survivors really badly mess up.
    • Play survivor. Learn where survivors move and how they path, shoot POTD to hit them. That's what I did in that last clip.

    And, yeah, that's about it. If people have any questions please let me know and I'll try to answer them as best I can, though I think this is comprehensive enough.

    Wow Thank you for your Work to provice us your Guide! I love it :)

  • @GoodBoyKaru said:

    So a few attentive people may recognise this from a comment I made yesterday (technically it was 24 minutes into today but let's not talk semantics). A couple of people suggested I make it a real post because "That's an excellent guide, very well put together." So, here I am. I've added a few more things so it's still worth a read.

    This will cover what is, in my opinion, his best build and why, as well as a few tips on playing him & a few videos.

    So hey, it's me- GoodBoyKaru, your friendly neighbourhood Pyramid Head main- here to give some swift Tips and Tricks(tm) to help make you a better Pyramid Head player!

    For the record, this was made during DBD Patch 4.7.2

    Build

    PERKS

    My personal favourite and imho strongest build is this:

    • Corrupt Intervention

    https://us.v-cdn.net/6030815/uploads/5A01IV8RME2M/image.png

    Crucial early-game slowdown on a killer without mobility, allows him to stall the game massively because survivors know that if they get found they're doomed.

    • Pop Goes The Weasel

    https://us.v-cdn.net/6030815/uploads/FHA7ZFNAKVZY/image.png

    It's the second best gen regression perk in the game, Ruin is too volatile to be anywhere near reliable on him because, again, no movement speed, he needs gen perks because he cannot move around the map quick enough, 11/10. "But you don't hook pe-" WRONG. You should be getting plenty of value out of PGTW and if you're overcaging then you're taking your map pressure and throwing it out the window.

    • Barbeque and Chili

    https://us.v-cdn.net/6030815/uploads/SC8THLXSY3RP/image.png

    Now, you could obviously put other perks here like Infectious Fright (amazing snowball), Tinkerer (Undetectable is nice and it helps tell you where to go but again no movement speed) or Discordance (amazing info, can sometimes do nothing about it). However I say BBQ because I like the perk and also because bloodpoints.

    • I'm All Ears

    https://us.v-cdn.net/6030815/uploads/V90CSL0I44NO/image.png

    Hands down the best perk in the game for Pyramid Head, that's six seconds of wallhacks. I cannot stress how valuable this is with his power- that is a guaranteed free hit in 9/10 situations. To show what I mean, I've linked a timestamped video below of where IAE comes in so clutch- continues to 5:16 in the video.

    https://www.youtube.com/watch?v=XJs4rvkppqs&t=296s

    (you can watch the whole thing if you really want I'm proud of the game).

    An honourable mention here goes to Ruin/Undying over Pop/Corrupt. As I've mentioned before, Tinkerer isn't a great perk on him due to his lack of speed, but the same goes for Ruin/Undying. You don't have the map mobility to defend your totems, especially if they spawn further away, and you'll probably end up losing two perks before 2 gens go. Corrupt/Pop is just more consistent in my experience.

    ADD-ONS

    So, his add-ons aren't great. The best ones, by far, are range add-ons which, when combined, extend his POTD by up to 2.5m (10.5m total). These are Burning Man Painting (Rare), Wax Doll (Uncommon), and Black Strap (Common), which ass +1.5m, +1m, and +0.5m respectively.

    tips

    Okay so rule number one is to not break pallets. Sounds weird but, just trust me.

    His power is incredibly strong in a chase- so much so that if a survivor commits to an animation they die. If you don't break pallets (with some exceptions like God pallets) you can do amazing things. Because who doesn't want more opportunities to win a chase, like, instantly? It turns incredibly safe pallets into death sentences

    To show what I mean, here's another timestamped clip. Ends at 10:58

    https://www.youtube.com/watch?v=gu3X5o9GpjY&t=646s

    Learn the range of the power. 8m is specific and sometimes you think you can hit things and you can't. You need to be very careful, especially when playing with range add-ons for so long, because it can and will screw with your perception.

    Adapt to the survivors you're facing. A lot of players will fake taking an animation, go to the side slightly to bait your POTD or your cancel, and then commit to the animation. If you turn to the side and release, you'll catch a lot of these survivors out and get a hit. It's really satisfying to do. Alternatively some survivors will commit to the animations regardless, in which case you'll know to aim in the centre. Other survivors will just hold W and pre-drop pallets, in which case you know to leave them because you'll really struggle catching up, or do not use your power.

    I cannot stress that enough. If a survivor is pre-dropping W key gaming, do not use your power. M1 killer them.

    Don't overcage and don't stress about torment. If a survivor loops you, they'll get tormented. That's just kinda how it works- you stick your knife in, follow them around a loop, and release your POTD after tracking their movements.

    To see what I mean we return to the first video, again timestamped. Clip ends at 1:36.

    https://www.youtube.com/watch?v=XJs4rvkppqs&t=83s

    See how I hug the car, turn the camera and use the power to hit him out of animation lock? Had he kept running, easy torment too.

    In my opinion, only cage someone in one of four scenarios:

    • You're afraid of a DS (just please don't tunnel I'm begging you)
    • You're afraid of an Unbreakable (much more likely)
    • You can immidiately get into another chase
    • It would place you into a Pressure Point Of No Return (name pending).

    What I mean by that last point is that there comes a time in a DBD game where the killer will hit a Pressure Point Of No Return, where the survivors physically cannot come back from the amount of pressure and momentum you're building. The best example of this as Pyramid Head is where you split the map through cages. You have two downed survivors. Cage one, hook the other. Nobody is on a generator, you have a BBQ proc to interrupt the person saving the cage or the hook, and now the last person must save both people. On especially large maps, like Mother's Dwelling, or multi-storied ones, like Midwich, this can force people into second stage and you've won the game at 5 gens. It's more common than you'd think.

    If you cage at other times you're probably wasting pressure you could've gotten from a hook.

    Learn where you can and can't lay trails. In front of totems and lockers? Amazing. In front of a gen? Not at all, it becomes a Restricted Trail Element and disappears after a few seconds. The DBD Wiki has a section on this which I'll just paste below.

    https://us.v-cdn.net/6030815/uploads/2808XTGCLSHV/image.png

    I'd highly, highly suggest reading the wiki page on his power as it's really useful in understanding the fundamentals and giving actual values to words. Here it is:

    https://deadbydaylight.fandom.com/wiki/Pyramid_Head

    Finally, learn where you can and can't use POTD. It sounds like a simple thing but learning where you can and can't use it, however there's a lot to it. For example, learning how vertical changes affect it. Did you know if you release his power on a slope going up it'll fail, same with releasing it on a slope going down. However, if you're barely off of the slope it'll travel down it, but only if it isn't too steep.

    It's nuts but knowing where you can and can't actually have an ability is, funnily enough, pretty important.

    A few more quick-fire tips:

    • Don't just go for animation lock shots. People expect these and adapt. Be unpredictable to catch them off guard and get easy hits. Like this:

    https://www.youtube.com/watch?v=0U1k10I-zG4&feature=emb_logo

    Bet they didn't expect that one :p

    Needless to say that was where I hit a Pressure Point Of No Return and poor Jakey couldn't pick up the scraps.

    • Don't spam his power. You waste too much time. Be precise, predict, and adapt to your opponents.
    • Don't spam his trails. You move at 110% and you already lack a movement ability, you waste too much time.
    • Tunneling isn't the best strategy. I know it seems like it because cages but again, you do not have a movement ability. Survivors can and will facefuck generators and ruin your day substantially.
    • Dead Dawg Saloon and Hawkins are both maps you never press M2 on ever. Play like a default M1 killer because the map design prevents you from using your power. They're pretty much auto-loss maps, ngl, unless the survivors really badly mess up.
    • Play survivor. Learn where survivors move and how they path, shoot POTD to hit them. That's what I did in that last clip.

    And, yeah, that's about it. If people have any questions please let me know and I'll try to answer them as best I can, though I think this is comprehensive enough.

    I used stbfl with him and it’s not the best but the animation is really cool at 8 stacks

  • The @GoodBoyKaru approved go-to Pyramid Head build is CallOfBrine/IamAllEars/LethalPursuer/Deadlock, as you all might know.

    With the release of Wesker I have played around with Awakened Awareness, and I really like it. It was nerfed so that it doesn't leave a lingering afterimage for Lethal Pursuer to extend, but it gives a lot of map awareness and allows some cheeky POTDs against sneaky survivors in the vicinity. I switched it in for CoB, I always loved the extra pressure that CoB generates over time, but AA is really good, not only allows it some fun snipes, but sometimes you will notice a survivor who is minding their own business just at the edge of it or at another floor or you see someone slowly moving into locker and all of this allows you to quickly get into the next chase, often with the survivor who was actually preparing to do the unhooking.

    Awakened Awareness might be my new favorite perk ever and I highly recommend it to my fellow Pyramid Head connoisseur. Have fun and happy hunting.

  • I just miss when you could zone survivors out. I never clicked with him after that nerf.

  • @EldritchElise87 said:

    I just miss when you could zone survivors out. I never clicked with him after that nerf.

    He was a rather steep learning curve and not gonna lie, when you stick that sword into the ground it feels overtly clunky and not very fun. But if you keep it up you will eventually be hitting some very cheeky and corny shots and better anticipate where to aim when a survivor turns a corner etc.

    And no matter how clunky he is, you can still prevent survivors from actually using this aweful, short, round loops and greeding that palette there, just stick your sword into the ground and they will run straight through the palette, so zoning still works pretty well.

    And some survivors will take PAINS not to step into goo on the ground, letting you easily gain distance on them. All in all, Pyramid Head is a very rewarding killer, once mastered and pretty strong and its actually lore accurate to tunnel the living daylight out of survivors, because he is "a sadistic monster, obsessed with enacting punishment through pain", buuut don't do that, you can do fine without.

1 2 ›